
Air Explorer를 구입하여 모든 기능을 사용하는 방법
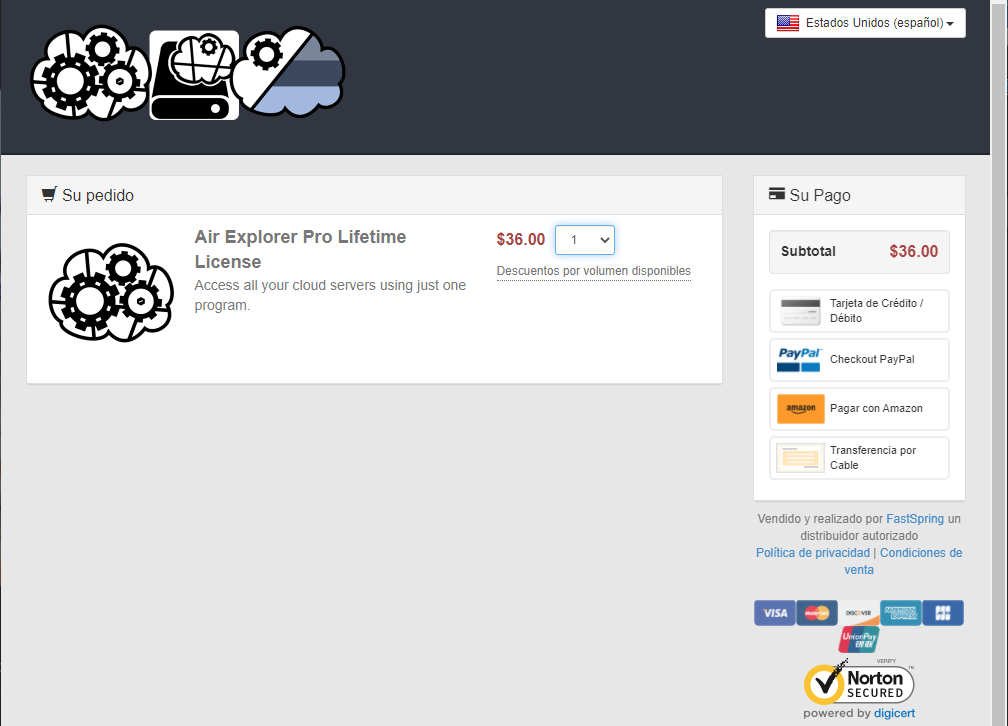
Pro 버전 구입은 아주 쉽습니다. 소프트웨어에서 소프트웨어 판매 페이지에 연결할 수 있습니다.

또는 다음 URL을 입력하고 직접 연결할 수 있습니다.: www.airexplorer.net/ko/pro.php
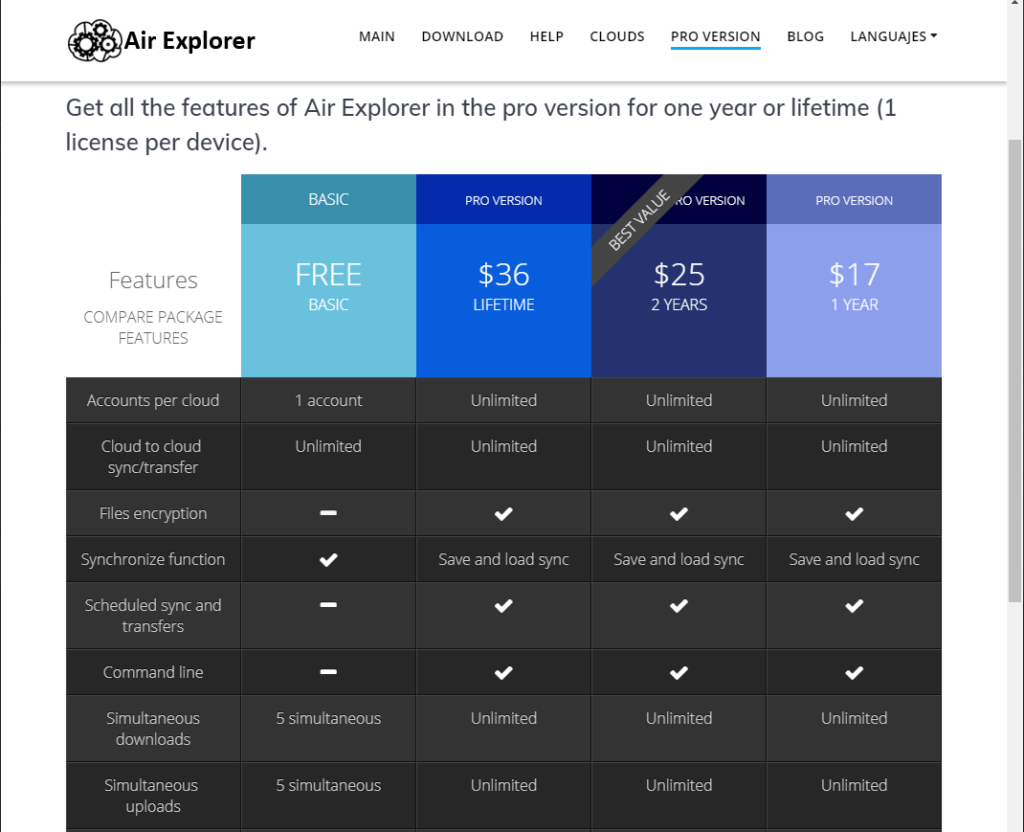
라이선스 기간(평생 또는 1년)을 선택하고 클릭합니다. 그러면 구매 완료 완료를 위해 AirExplorer 상점 페이지로 이동됩니다.
구매 후 소프트웨어를 등록할 수 있는 인증 코드가 포함된 이메일이 전송됩니다.
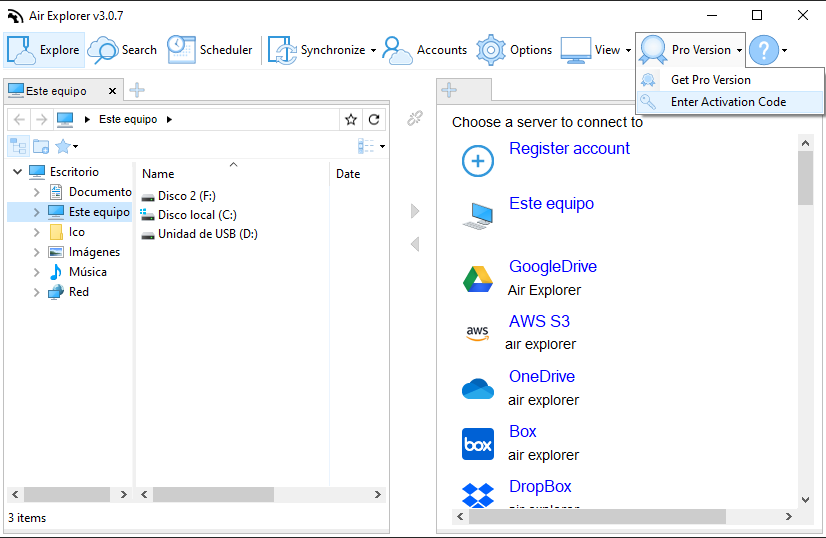
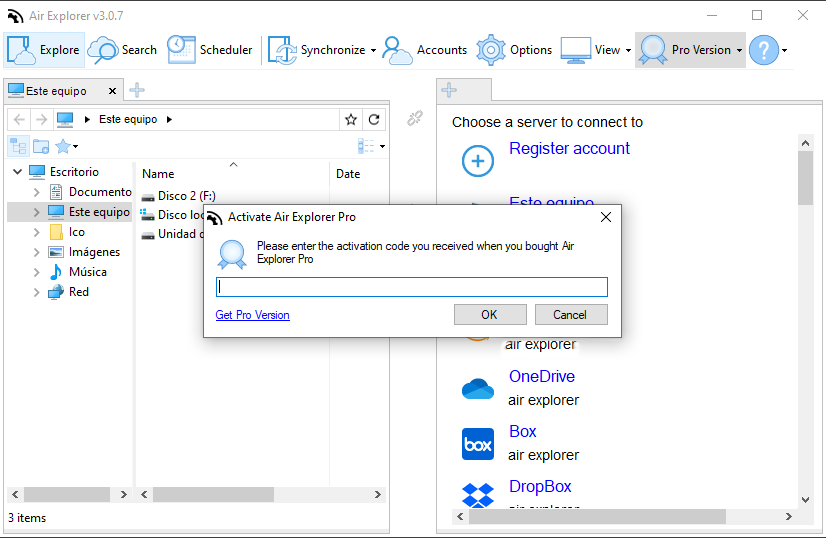
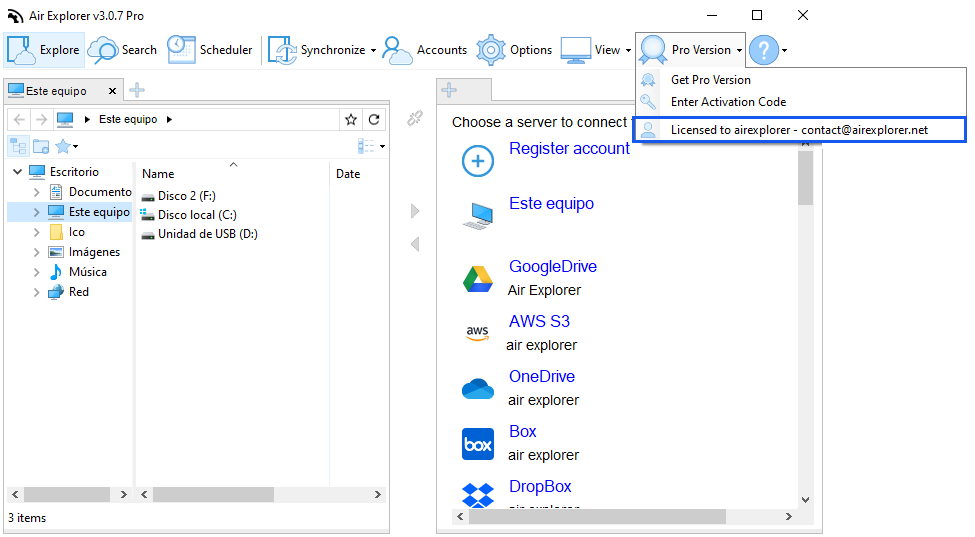
모든 것이 유효하면 Pro 버전 메뉴에서 라이센스 데이터를 확인할 수 있습니다.
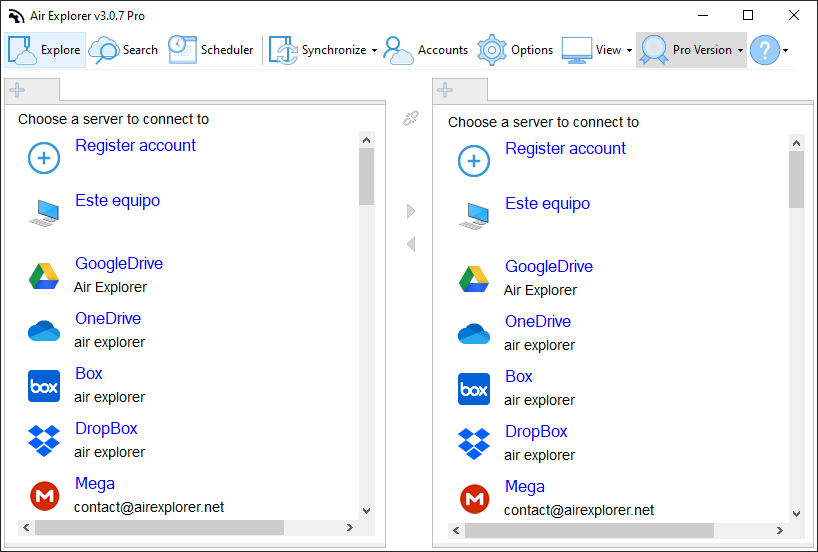
클라우드 서버 계정을 추가하는 방법은?
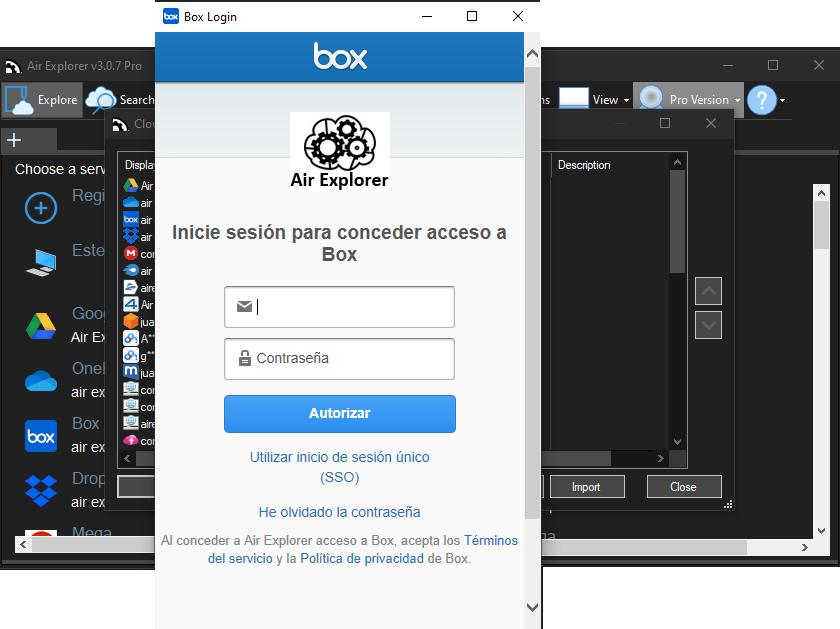
처음 Air Explorer를 열면 클라우드 서버 계정을 추가하는 창이 나타납니다.
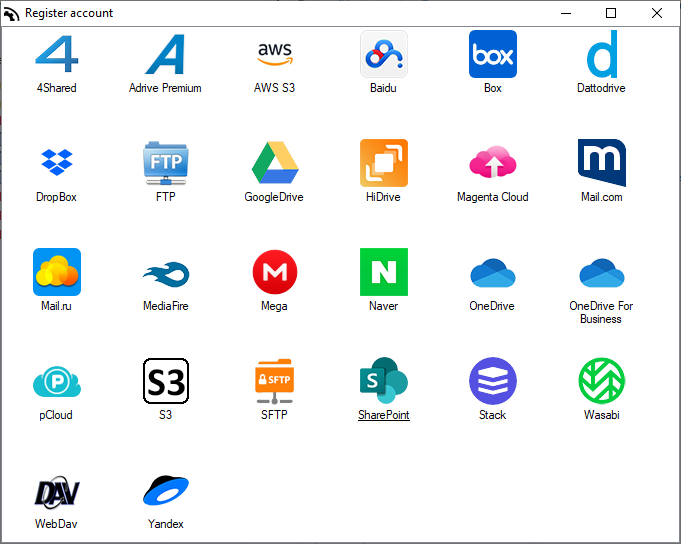
클라우드 서버 계정 창을 열어 더 많은 계정을 추가하려면, 메인 메뉴에서 “계정” 버튼을 누릅니다.

하나의 클라우드 서버에 두 계정을 추가하는 방법은?
처음 부분은 클라우드 서버 계정을 추가할 때와 동일합니다. 다만 클라우드 서버를 선택할 때 서버에 따라 다음의 단계가 있습니다.
일부 클라우드 서버들은 바로 두 번째 계정을 추가할 수 있으며 다른 클라우드 서버들은 Internet Explorer에서 첫 번째 계정을 로그 아웃 해야 합니다. 그런 다음 두 번째 계정을 추가할 수 있습니다.
Air Explorer에서 FTP 전송하기
Air Explorer는 FTP 클라이언트로 작동할 수 있습니다. FTP 서버와 컴퓨터 또는 지원되는 클라우드 서버 간에 파일을 전송할 수 있습니다.
Air Explorer에 FTP 클라이언트를 추가하는 것은 매우 쉽습니다. 먼저 새로운 클라우드를 추가하는 것과 동일한 방법으로 “계정”버튼을 클릭합니다.
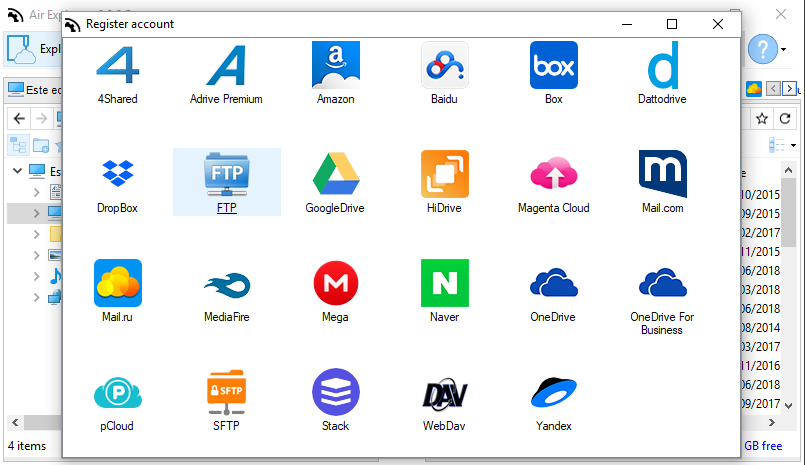
FTP 계정의 로그인 데이터로 서버, 사용자 이름 및 암호를 추가합니다.

Air Explorer에서 FTP를 성공적으로 추가하면 FTP의 모든 내용이 Air Explorer의 인터페이스에 표시됩니다. 이제 FTP 계정에 업로드하고 다운로드 할 수 있습니다.
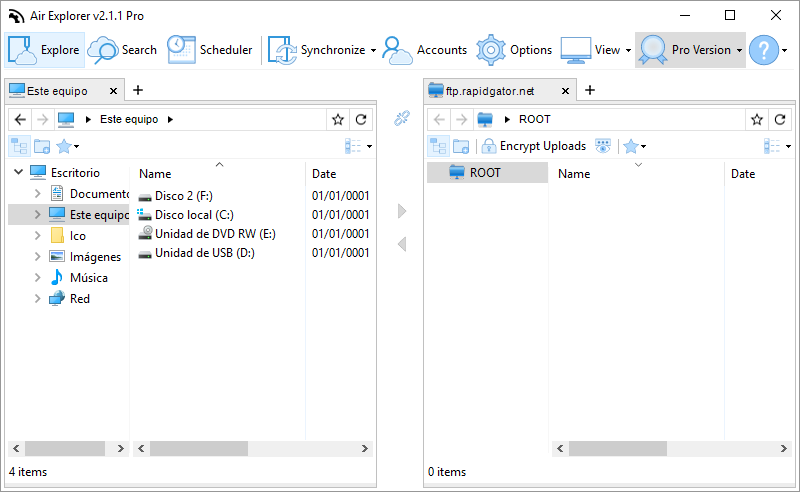
Pro 버전에서는 여러 FTP 계정을 추가할 수 있으며 FTP 간에 파일들을 복사하고 동기화할 수도 있습니다.
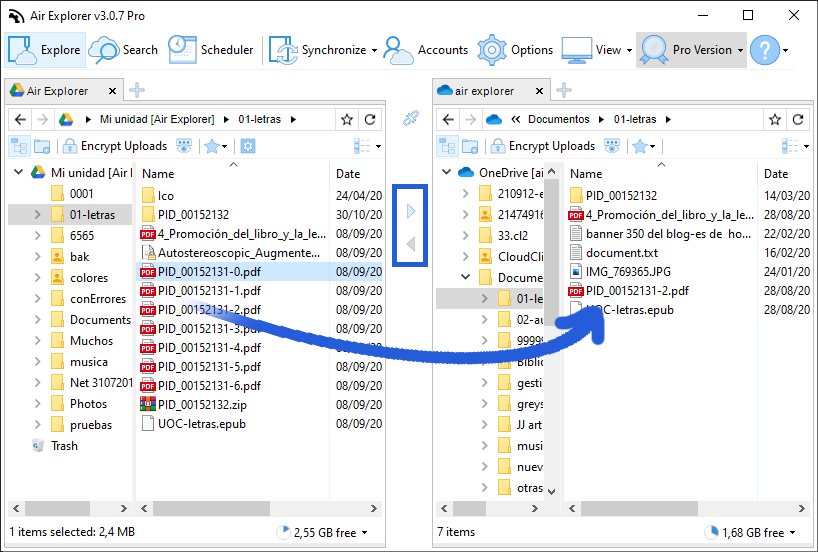
How to copy files from one cloud to another?
Transferring files from cloud to cloud is very easy with Air Explorer. First you have to add your cloud accounts. Air Explorer supports the most important clouds, you can add all you want and transfer files and folders between them.
Then you have to open one cloud in one window and the other cloud in the other window. No matter the order, you can place one on the right and other on the left.
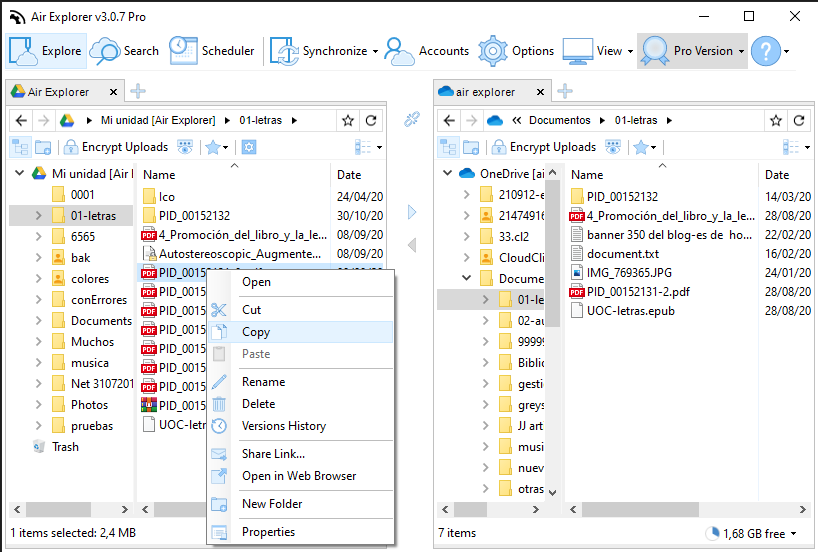
Finally, copy / paste, use the arrows or drag and drop files or folders into the clouds. You can monitor the process at the bottom of the program, here you can follow the transfer progress.
You can check more information here:
-How to copy files from Google Drive to Onedrive?
-How to move files from Onedrive to Google Drive. Monitor the transfer process.
-Transfer files from Mega to other clouds
예약 기능
Air Explorer의 예약 기능으로 you can leave prepared the tasks of synchronizing and transferring files so that they are done in the schedule that you decide automatically.
새로운 작업을 추가하면 스케줄러 창이 열립니다. 이 창에서 예약할 복사/동기화 작업을 지정할 수 있습니다.
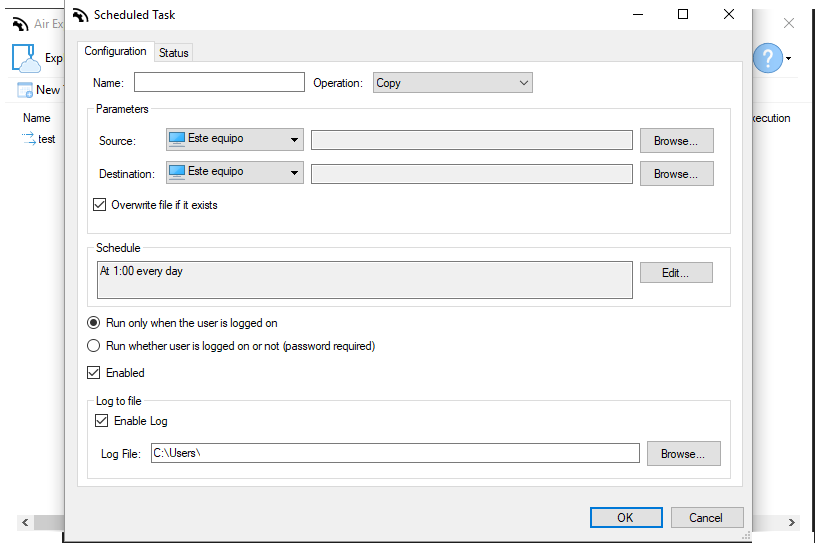
또한 예약 작업이 수행될 시간과 주기를 지정할 수 있습니다.

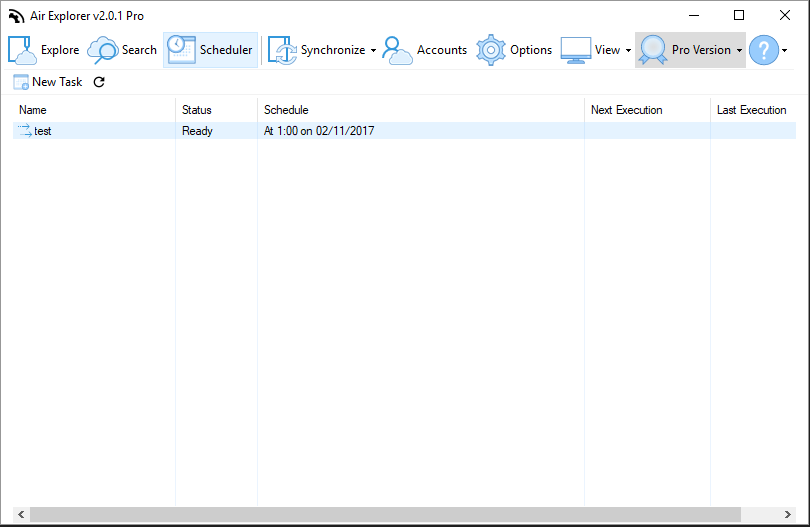
작업이 예약되면 메인 스케줄러 창에서 작업에 대한 간략한 요약을 볼 수 있습니다.
예약된 작업은 Air Explorer가 종료되었더라도 백그라운드에서 실행됩니다.
You can check more information here:
-Schedule synchronizations in Air Explorer for Mac
파일들을 암호화 / 복호화하는 방법은?
파일 또는 폴더를 암호화하려면 “업로드 암호화” 단추를 활성화해야 합니다.
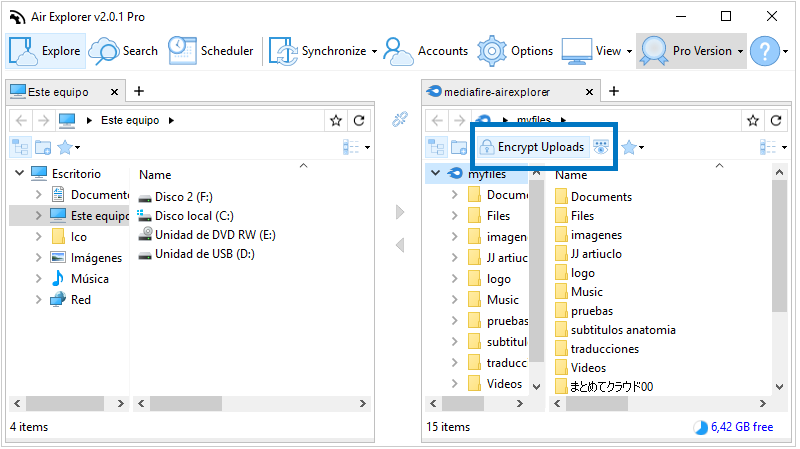
파일 또는 폴더를 전송할 때 복호화에 필요한 비밀번호를 묻는 창이 나타납니다.
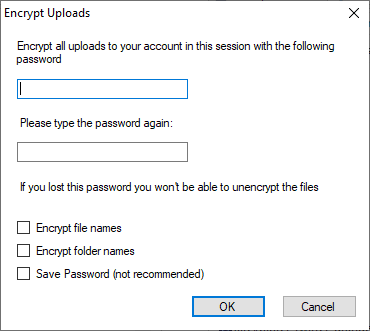
암호화된 파일을 내려받을 때 소프트웨어가 복호화에 필요한 비밀번호를 확인합니다.
You can check more information here:
-Encrypt files when you upload to the cloud
-Encryption protocol in Air Explorer
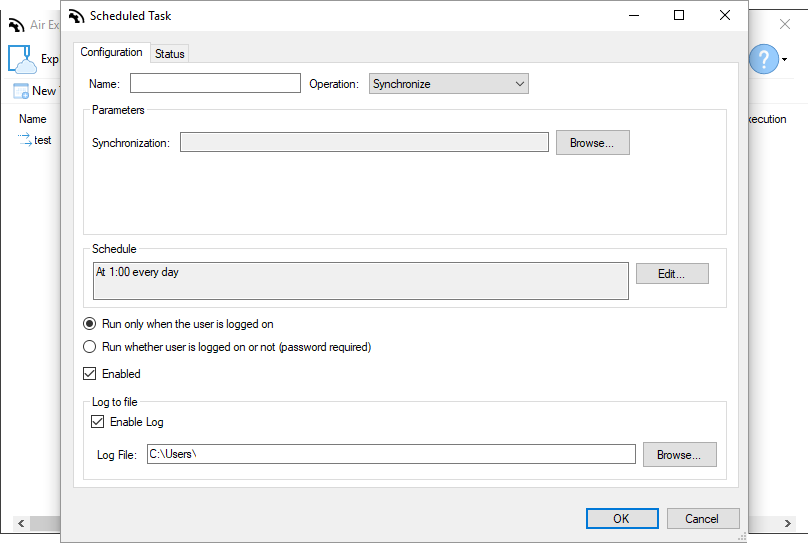
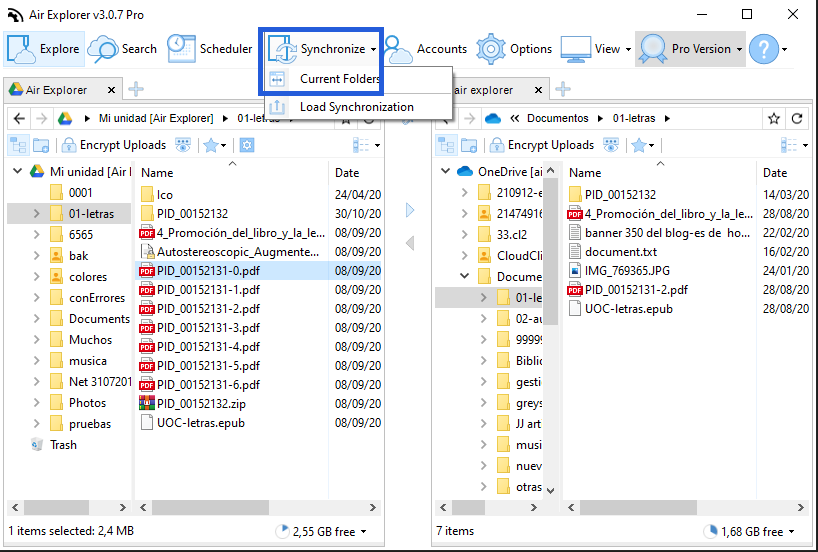
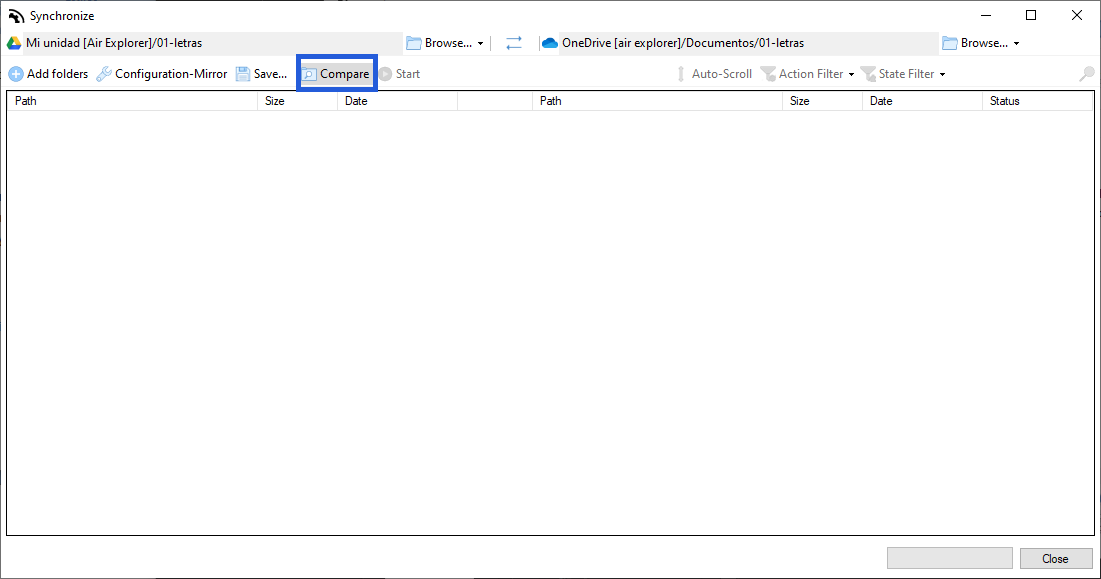
폴더들을 동기화하는 방법은?
폴더를 동기화하려면, 먼저 비교할 두 폴더를 선택해야 합니다. 다음으로 “동기화” 버튼을 누릅니다
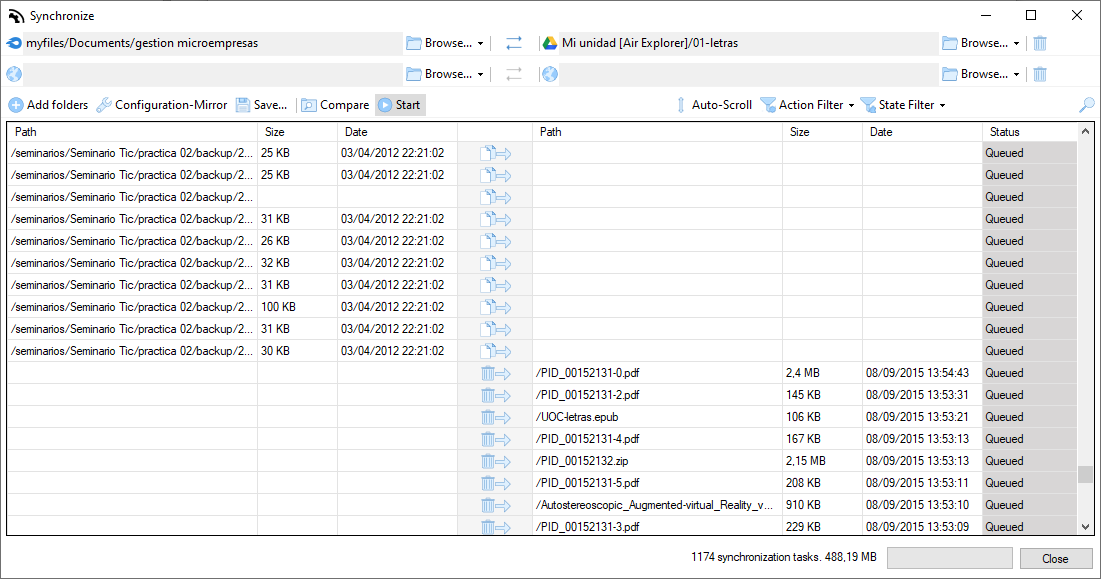
동기화 창이 열리면, 원하는 동기화 방식을 선택할 수 있습니다.

사용 가능한 동기화 방식:
– 미러: 좌측에서 우측으로 복제합니다.
– 업데이트 미러: 최신 파일들만 복사하여 좌측에서 우측으로 복제합니다.
– 업데이트: 왼쪽에서 오른쪽으로 새로운 파일들을 복사.
– 양방향: 최신 파일들을 양방향으로 복사합니다.
– 사용자 정의: 개인화 설정.
You can check more information here:
-Sharepoint file manager and synchronization tool
-Air Explorer for Mac, for backups and synchronizations
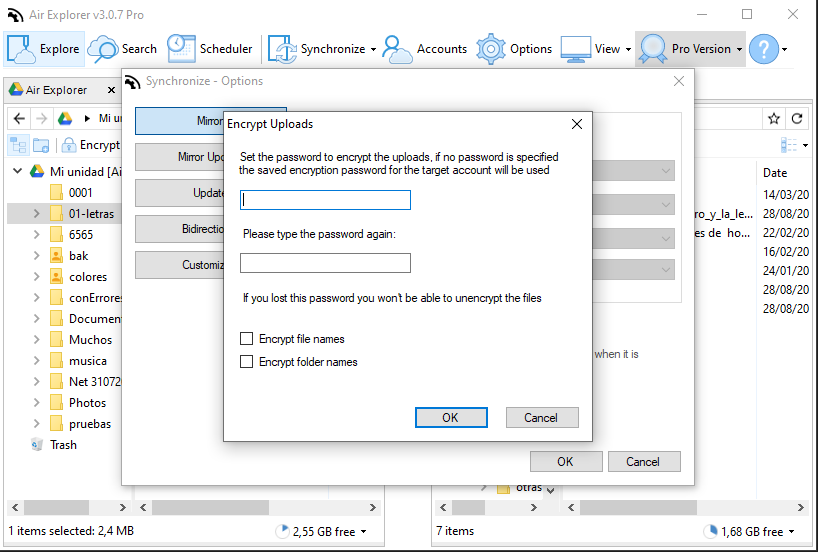
How to synchronization files between my computer and the cloud by encrypting the files when uploading them.
First, select the two folders to compare and then click the “Synchronize” button.
Once the window is open, you can select the type of synchronization you want to make and if you want to encrypt the files when uploading them. If you choose to encrypt when uploading, a window opens to enter a password. This password will be used to encrypt the files and you will not be able to decrypt them if you lose it.
Once all the settings have been selected and accepted, the synchronization screen opens and you can now click the “compare” button to start the comparison between folders.
You can save the synchronization to run it whenever you want or create a scheduled task to run periodically automatically.
동기화에서 파일들을 제외하는 방법
어떤 특정 파일들을 제외하기 위해 규칙을 구성할 필요가 없습니다. 동기화 작업 목록에서 파일을 찾아서 동기화 작업 아이콘을 클릭하고 “아무 것도하지 않음”을 선택하면 됩니다.
그렇지만 여러 파일들을 쉽게 제외하도록 규칙을 설정할 수 있습니다. 규칙을 구성하려면 동기화 구성 창에서 “필터” 단추를 누릅니다.
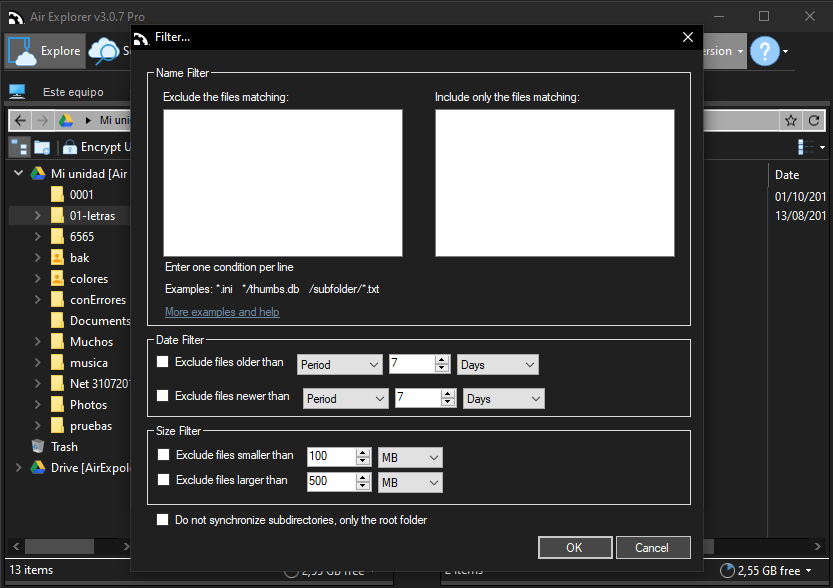
규칙을 입력하려면 다음 지침을 따르십시오.
– 각 목록 항목은 동기화 기본 디렉토리에 상대적인 파일 또는 디렉토리 경로라야 합니다.
– 각 줄당 하나의 항목이 있어야 합니다.
– 와일드카드 *를 사용할 수 있으며 0 개 이상의 문자를 의미합니다.
– 항상 디렉토리 구분 기호로 / 문자를 사용하세요.
예제:
– 단일 파일 제외: /file.txt
– 모든 mp3 파일 제외: *.mp3
– thumb.db라는 이름의 모든 파일 제외:: */thumbs.db
– thumb.db라는 이름의 모든 파일 제외:: */thumbs.db
– 이름에 “myfile”이 포함된 모든 파일과 폴더 제외: *myfile*
정규식을 나타내기 위해 복합적인 정규식을 사용할 수도 있습니다. 대괄호 [ ] 사이에 입력하세요. 정규식에 대한 자세한 정보는 여기에서 참조하세요:
https://msdn.microsoft.com/en-us/library/az24scfc(v=vs.110).aspx
정규식 예제:
– 모든 텍스트 파일 제외: [.*\.txt$]
– /aaa 폴더의 모든 txt 파일 제외, 하지만 /aaa 하위 폴더의 txt 파일은 제외 안함: [^/aaa/[^/]+\.txt$]
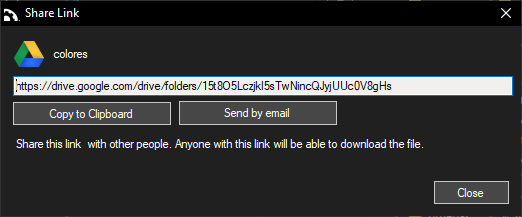
파일들을 공유하는 방법은?
파일을 공유하려면, 공유할 파일에서 마우스 우-클릭하고 “공유 링크 만들기”를 선택합니다.
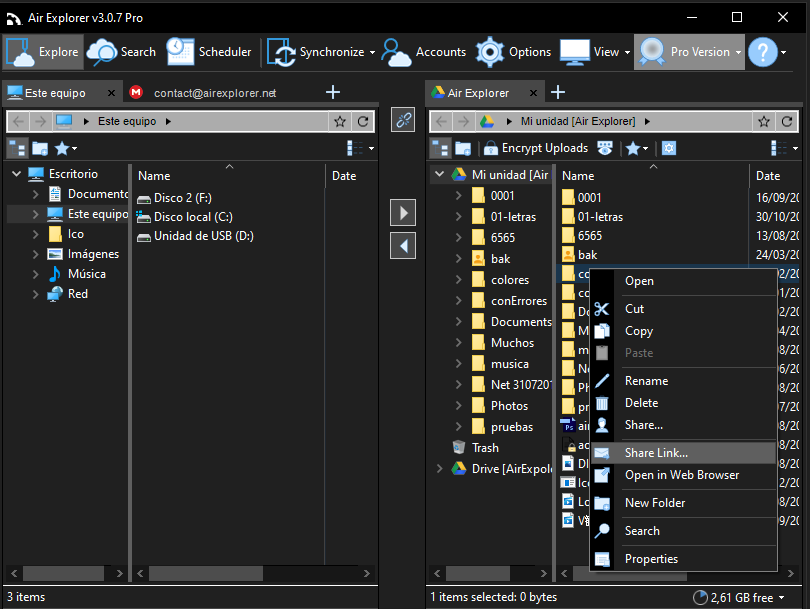
창이 열리고 파일을 공유할 수 있는 링크가 나타납니다. 이 링크로 누구나 파일을 다운로드 할 수 있습니다.
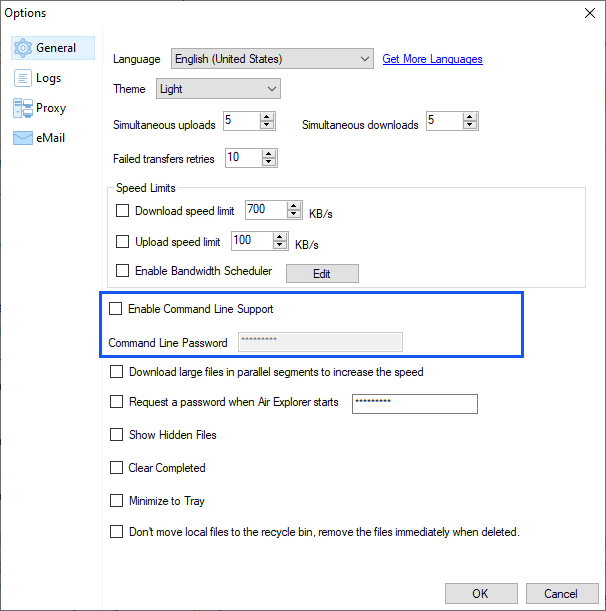
명령 줄로 클라우드 파일 관리
Air Explorer에는 Air Explorer를 열지 않고도 클라우드 서버에서 일부 작업을 수행 할 수 있는 명령-줄 클라이언트가 있습니다. 자동 파일 전송, 자동 동기화 등 자동으로 실행할 수 있는 일괄 작업에 매우 유용 할 수 있습니다.
첫 번째 단계는 옵션 화면에서 이 기능을 활성화하는 것입니다. Pro 계정에서만 사용할 수 있습니다. 명령-줄 암호를 추가하는 것을 기억하세요.
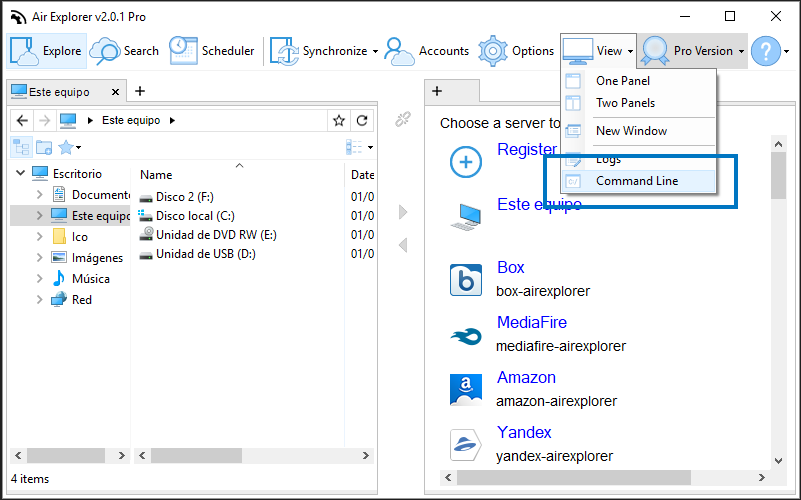
명령 줄 창에 액세스하려면 시작 메뉴에서 CMD 명령으로 열거나 “보기” 메뉴에서 바로 가기로 엽니다.
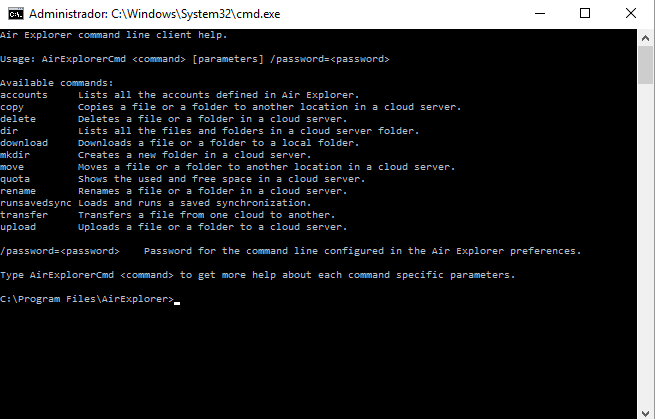
사용 가능한 작업:
– Accounts: Air Explorer에 추가된 모든 계정 나열.
– Copy: 파일 또는 폴더를 클라우드의 다른 위치로 복사.
– Delete: 클라우드 서버의 파일 또는 폴더 삭제.
– dir: 클라우드 서버 폴더의 모든 파일과 폴더 나열.
– Download: 파일 또는 폴더를 로컬 폴더로 다운로드.
– Mkdir: 클라우드 서버에 새 폴더 만들기.
– Move: 파일 또는 폴더를 클라우드 서버의 다른 위치로 이동.
– Quota: 클라우드 서버의 사용된 공간과 여유 공간 표시.
– Rename: 클라우드 서버의 파일 또는 폴더의 이름 바꾸기.
– Runsavedsync: 저장된 동기화 불러오기 및 실행.
– Transfer: 어떤 클라우드에서 다른 클라우드로 파일 전송.
– Upload: 클라우드 서버로 파일 또는 폴더 업로드.
작업을 실행하려면 명령-줄 패널에 나타난 다음의 지침을 따릅니다.
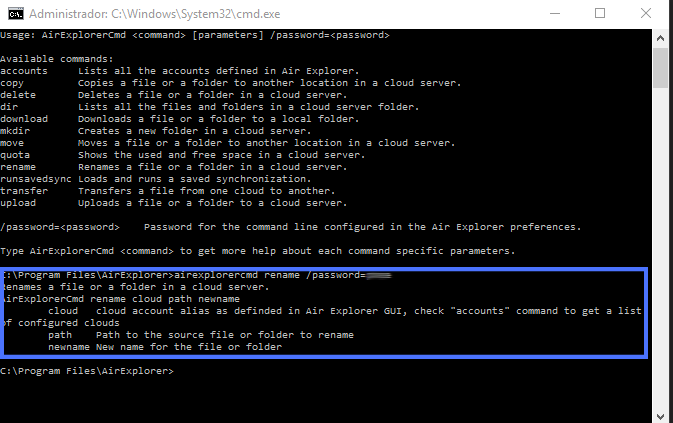
예를 들어, 다음과 같은 명령을 실행할 수 있습니다:
AirExplorerCmd.exe upload “fileName.doc” “MyBoxAccount” “/documents” /password=****
클라우드의 특정 대상 폴더(/documents)의 클라우드 서버(Box)에 파일(fileName.doc) 업로드하기.