
Schedule Your Backups with the Task Scheduler for Windows and Mac
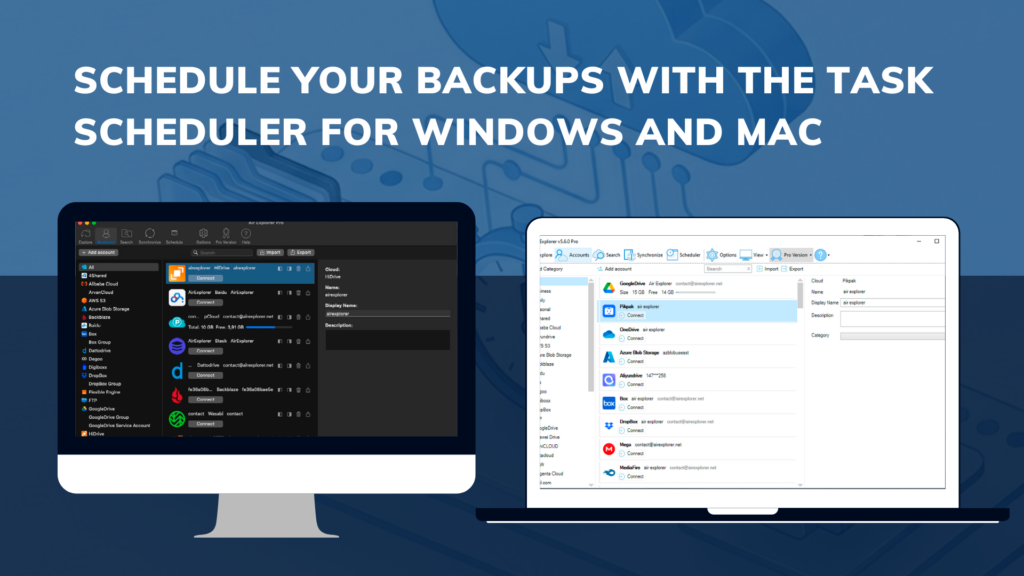
In today’s professional environment, efficient data management is the backbone of any business. Redundancy and security cannot depend on human memory; they must be systematic processes. Therefore, having a tool that allows for unattended scheduling on Windows and Mac is essential to ensure that your information is always backed up and available.
Using a native synchronization engine allows for the management of large data volumes with a stability that browser-based solutions cannot reach. Below, we detail how to transform your workflow by strategically using the task scheduler.
Advantages of Centralizing Scheduling on Your Computer
Centralizing your backups in an application installed on your operating system offers technical benefits that optimize both performance and security:
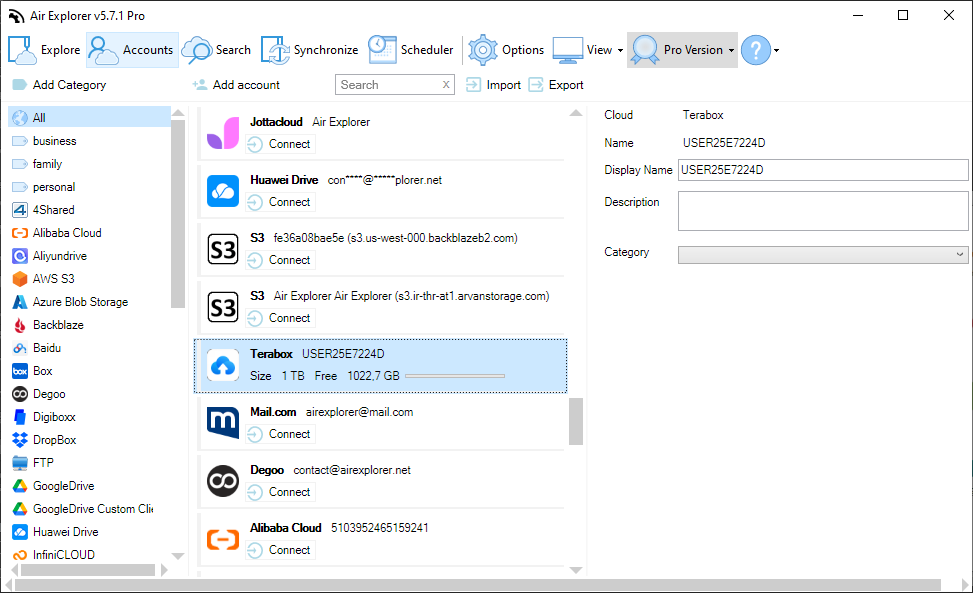
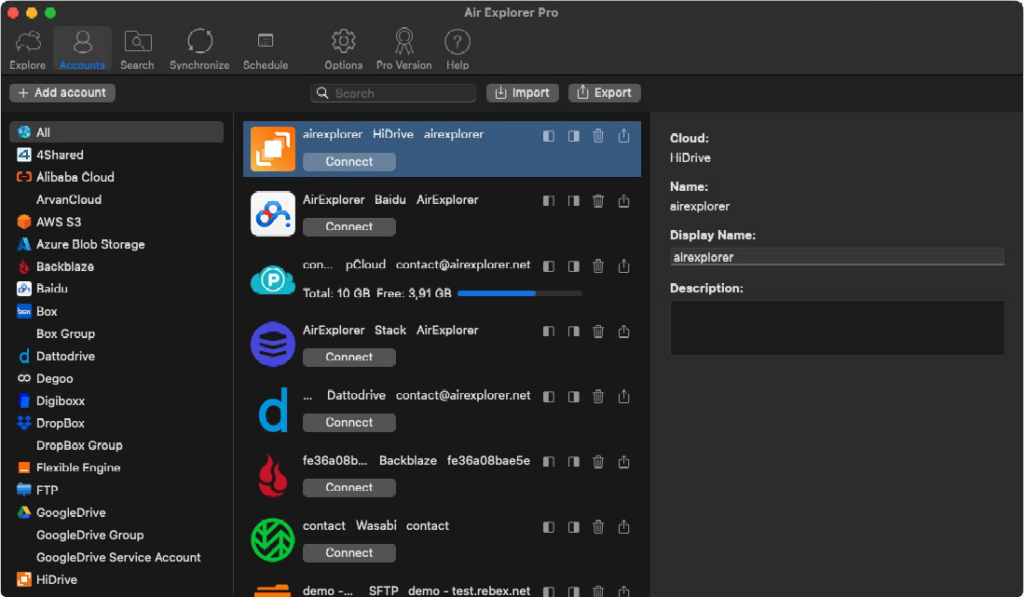
- Multi-Cloud Management: You can schedule tasks involving more than 30 providers (Google Drive, OneDrive, Dropbox, MEGA, AWS S3, etc.) from a single interface.
- Source Encryption: When scheduling a task, you can configure files to be encrypted before uploading, ensuring total privacy without additional steps.
- Bandwidth Savings: Intelligent synchronization modes allow only detected changes to be transferred, avoiding unnecessary uploads.
- Reliability: The scheduler runs in the background, meaning your backups will complete even if you do not have the main interface open.
Step-by-Step Guide: How to Schedule Automatic Synchronizations
To schedule your backups, the process is divided into two critical phases: task definition and its temporal scheduling.
Phase 1: Set Up and Save the Synchronization
Before scheduling, the system needs to know which folders you want to compare and how it should treat them.
- Folder Selection: Open the Synchronize tab. In the left column, select the source (e.g., your local drive or a NAS) and in the right, the destination (your preferred cloud).
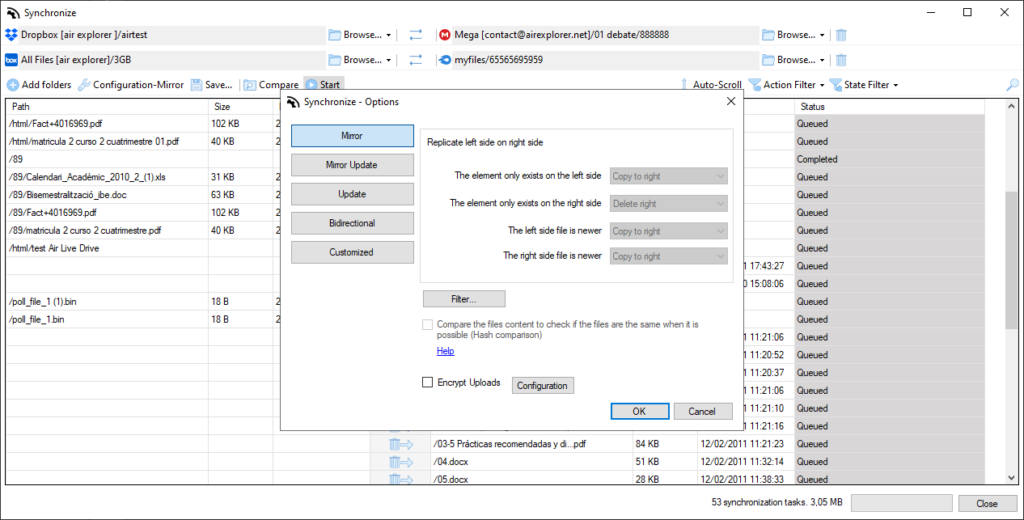
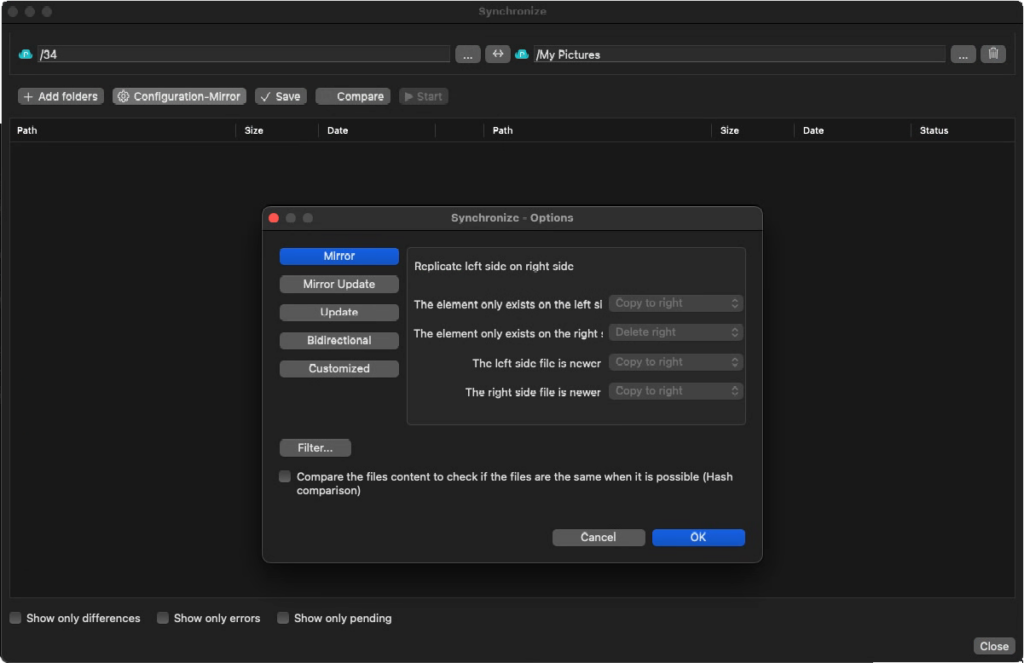
- Choose the Sync Method: Click on the configuration button to choose between:
- Mirror: Makes the destination an exact copy of the source.
- Update: Copies only new or modified files from the source to the destination.
- Bidirectional: Keeps both locations with the most recent files.
- Filters and Comparison: You can set filters to exclude temporary folders or very large files. It is also recommended to enable Hash comparison if you want extra security in data integrity.
- Save the Task: This step is vital. Once the sync is configured, press the Save button. Assign it a descriptive name (e.g., “Weekly Projects Backup”). This saved configuration is what we will use in the scheduler.
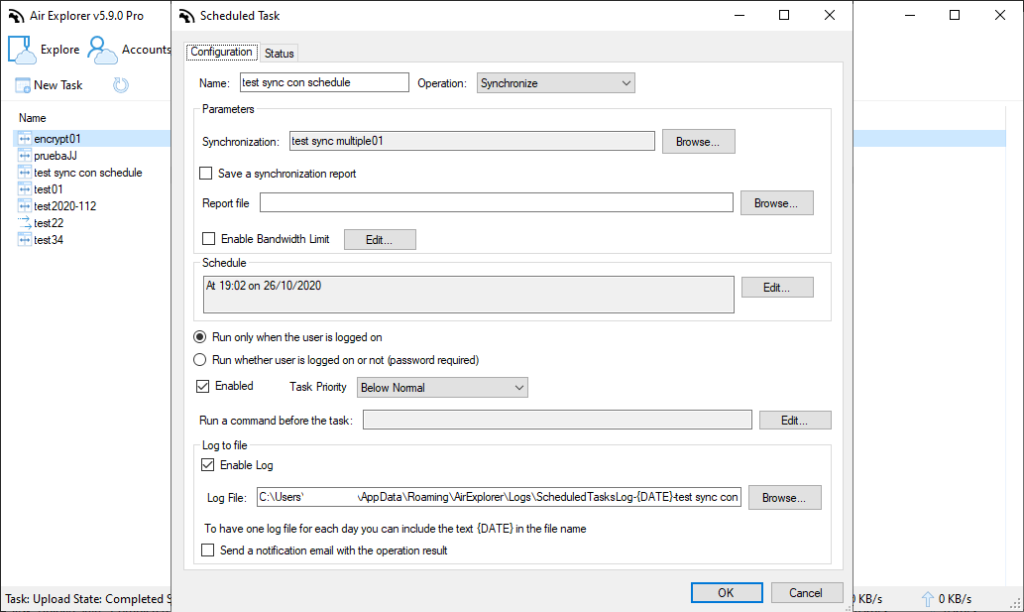
Phase 2: Configure the Scheduler
Once you have your saved task, it’s time to give it autonomy.
- Open the Scheduler: In the top toolbar, click on the Scheduler icon.
- Add New Task: Click on the “Add” button. A window will open showing all the synchronizations you have previously saved.
- Select the Task: Choose the synchronization you created in Phase 1.
- Set the Schedule: This is where you define the frequency:
- Daily/Weekly/Monthly: Choose the recurrence that best fits your workload. For security backups, a daily frequency during low activity hours is ideal.
- Start Time: Select a specific time (e.g., 01:00 AM) to ensure the network is clear.
- Days of the Week: You can check only business days or leave it for the weekend.
- Finish and Verify: Once configured, click “OK”. You will see the task appear in the scheduler list with its status and the next execution date.

Security and Error Control
The scheduler not only executes the task; it also allows you to monitor its success. In the options window, you can configure the sending of logs by email. This is especially useful for system administrators who need to confirm that backups for an entire office have been correctly performed without having to check each computer manually.
Additionally, if for any reason the internet connection is interrupted, the system will attempt to resume the task automatically, ensuring the backup does not remain incomplete.
Conclusion
Scheduling your synchronizations on Windows and Mac is the smartest way to protect your digital capital. By delegating this task to the scheduler, you free up time and eliminate the risk of forgetting, allowing your data infrastructure to work silently and efficiently for you.
You can check more information about more features here:
-How to Migrate from Google Drive to OneDrive (Without Using Local Disk Space)
-How to configure multiple sync tasks
-From Dropbox to OneDrive: simplifies cloud transfers
