

How to buy Air Explorer and get all its features
Getting the Pro Version is very easy. You can access the page of sale since the software.
Or you can just enter this url: https://www.airexplorer.net/en/pro/
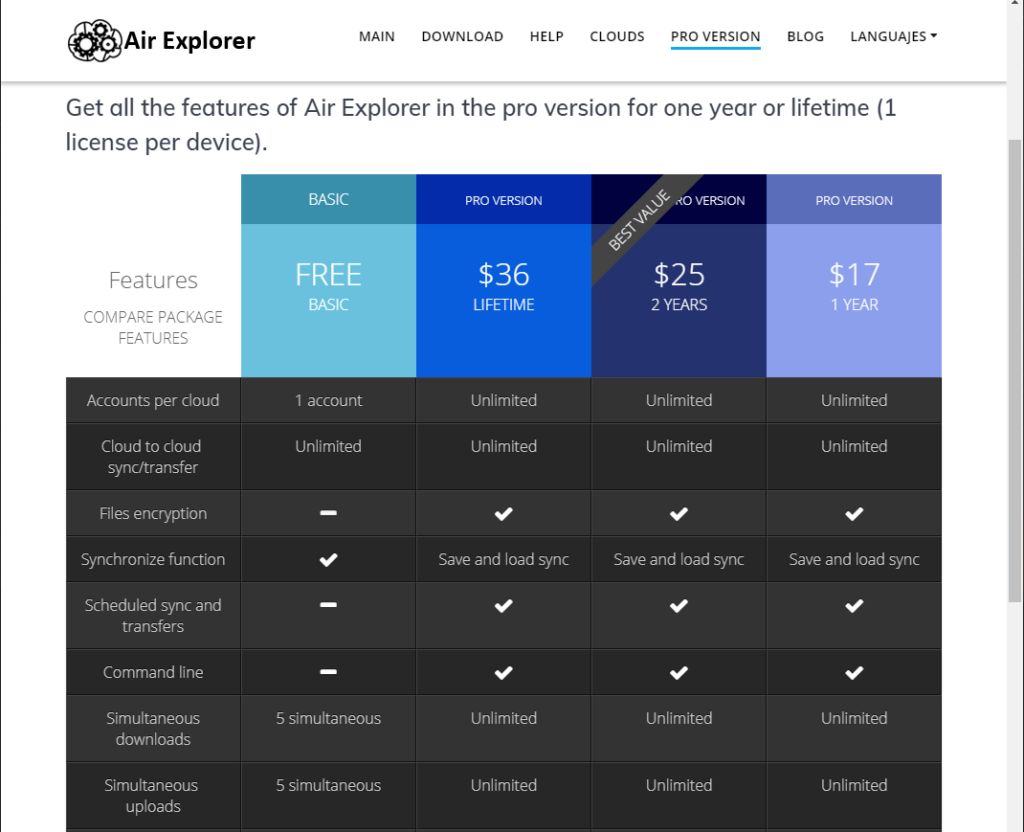
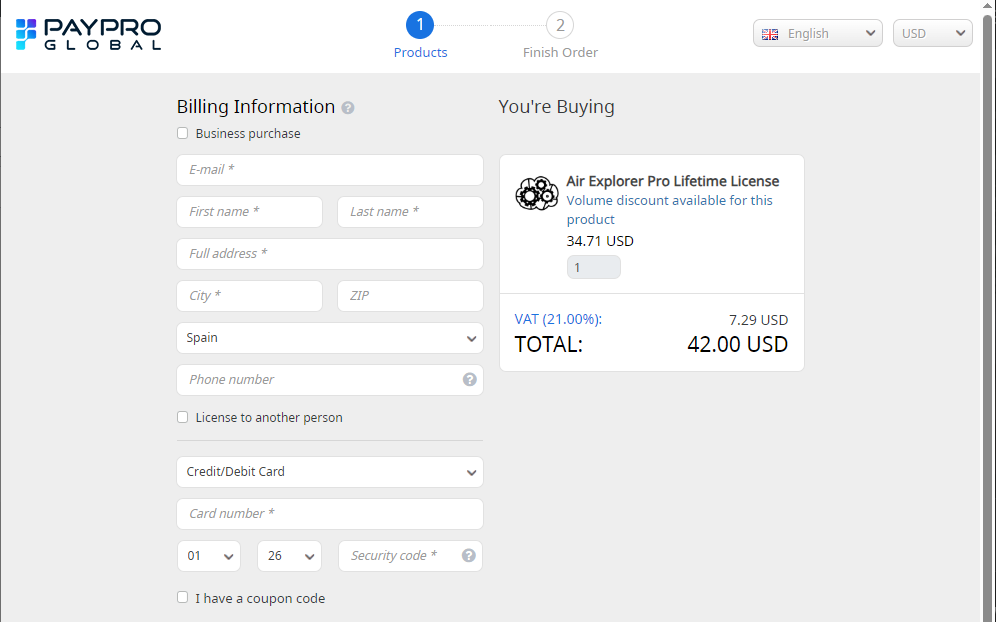
Select the option you prefer, Lifetime or One or Two Years, and click it. Then, you jumps to the AirExplorer Store Page where you have to complet the purchasing.
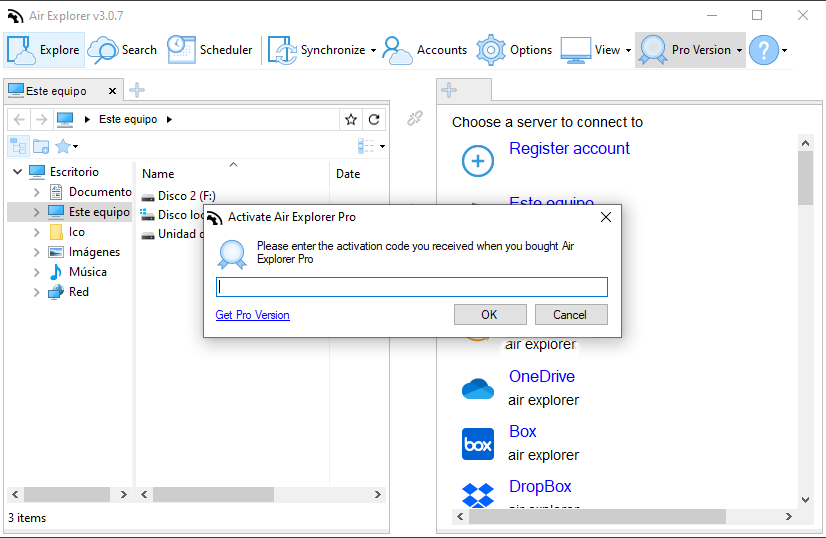
After the purchase, you will receive an email with your Activation Code that you have to enter into the software.

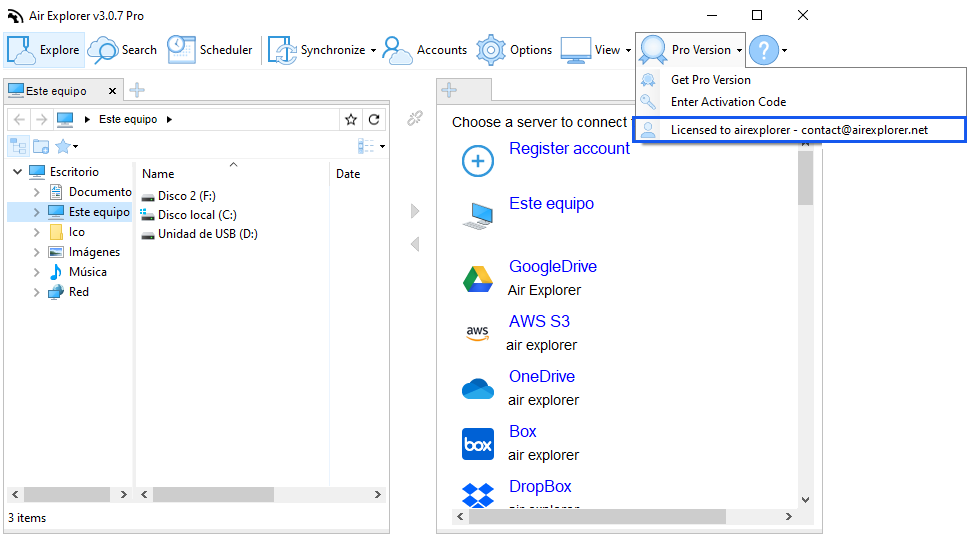
If everything is allright, in the Pro Version menu you can check your license data.
How do I add a cloud server account?
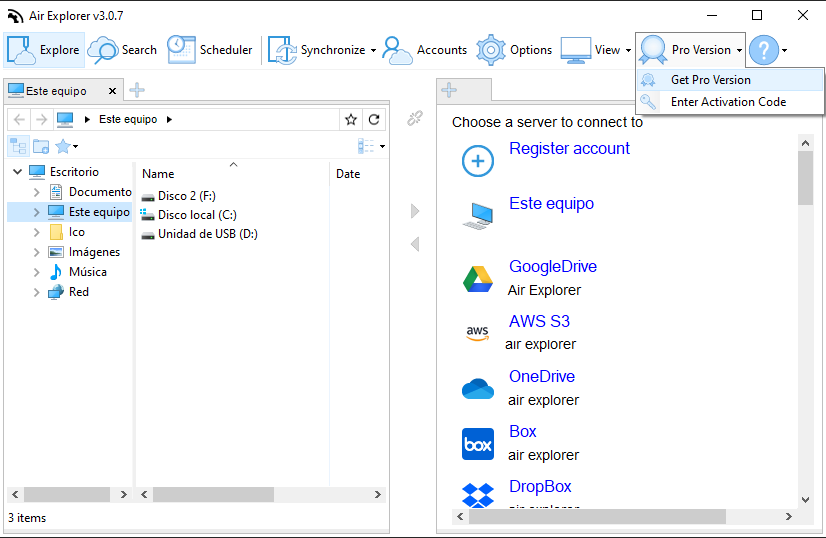
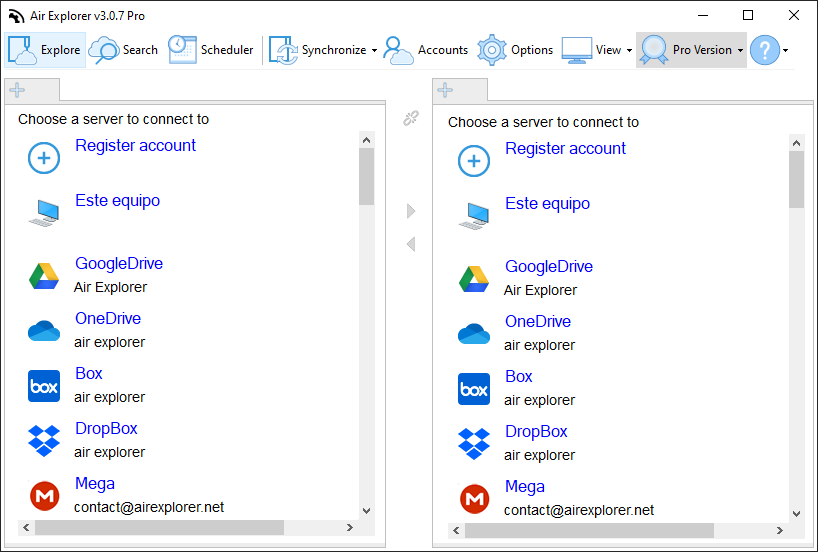
First time you open the software, a window appears to add the cloud servers accounts.
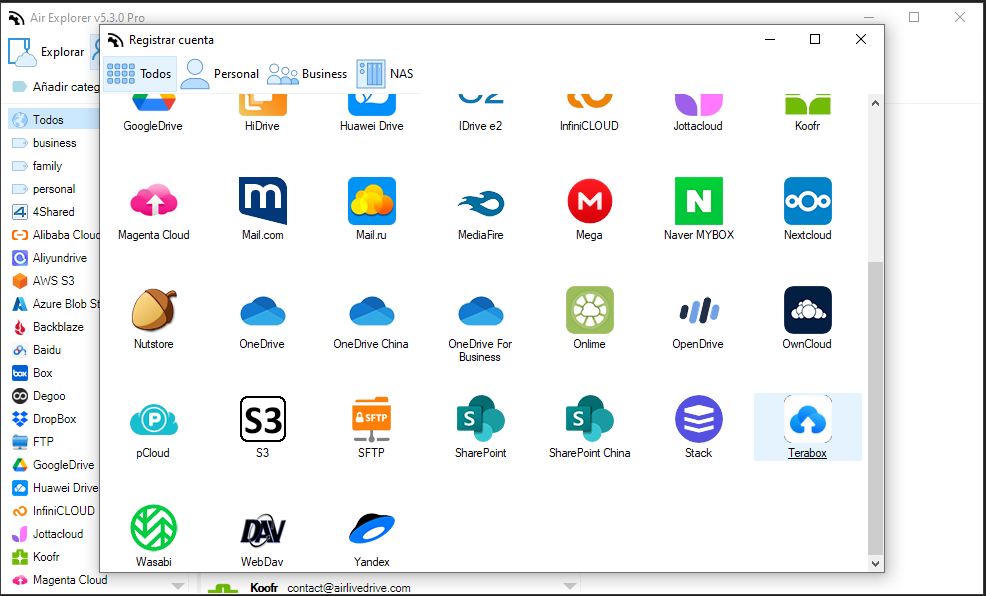
To open the cloud servers accounts window and add more accounts, you have to click “Accounts” button from the main menu.
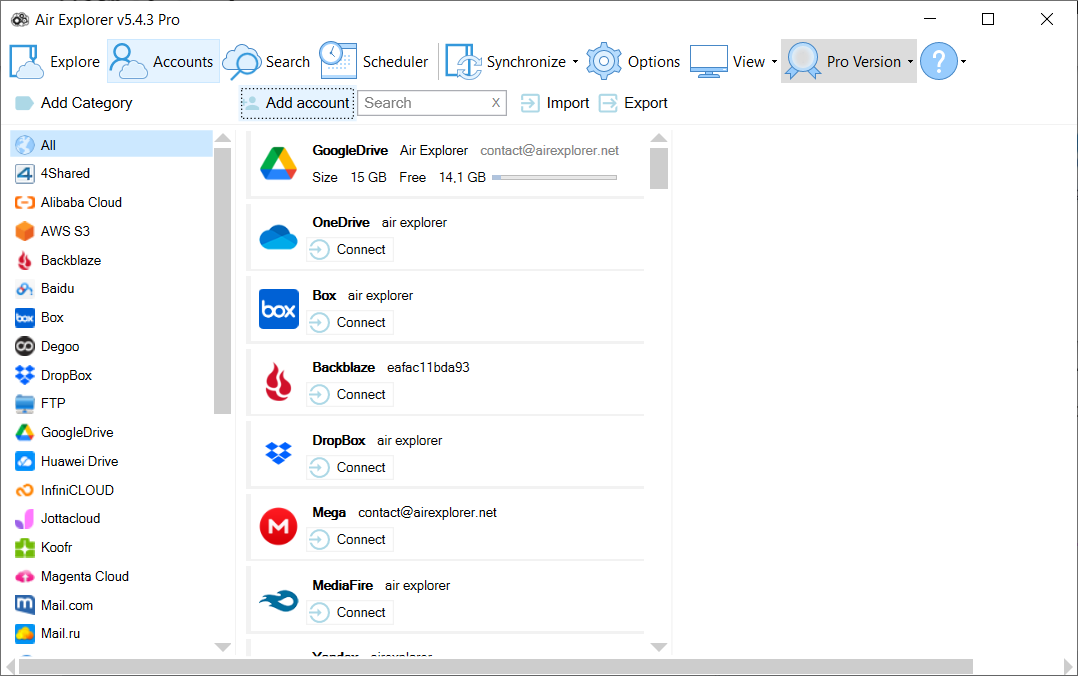
How do I add a second account for a cloud server?
The first part is the same when you add a cloud server account but, when you select the cloud server, the next step depends on the server.
FTP transfer with Air Explorer
Air Explorer can work as a FTP client. It allows you to transfer files between your FTP server and your computer or any other of the supported cloud servers.
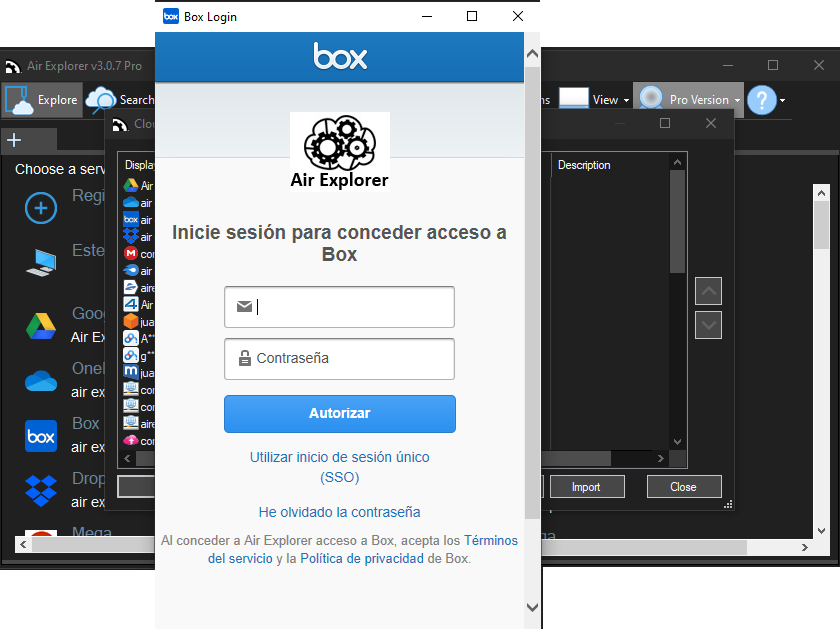
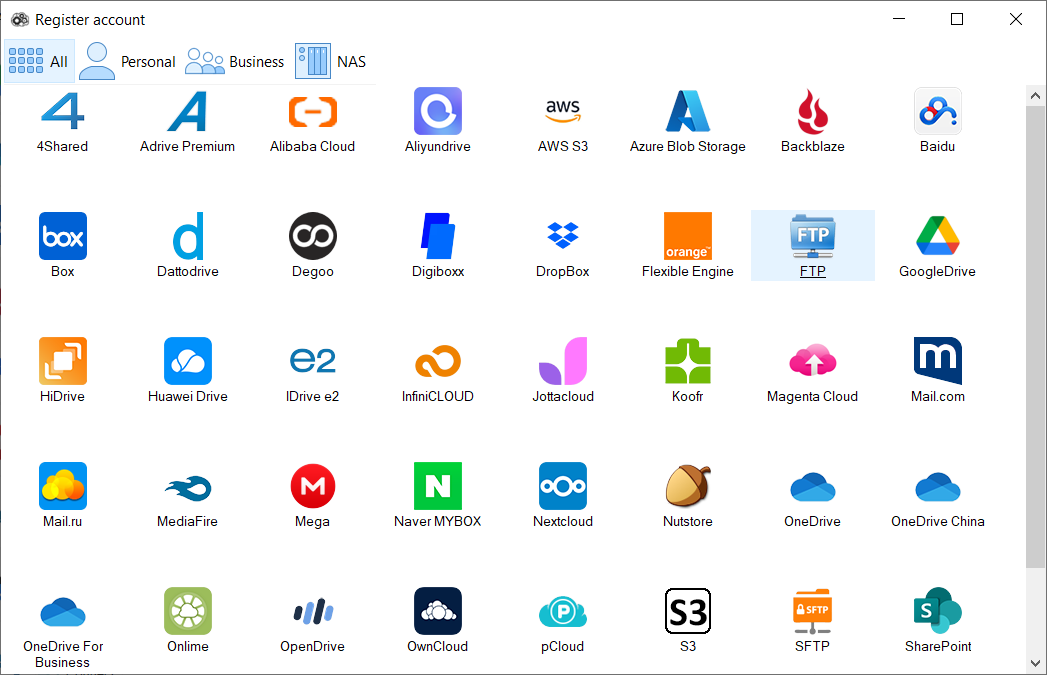
To add a FTP client in Air Explorer is very easy. First, click in the “Account” button, in the same way you add new clouds.
Add the login data of your FTP account: server, username and password.
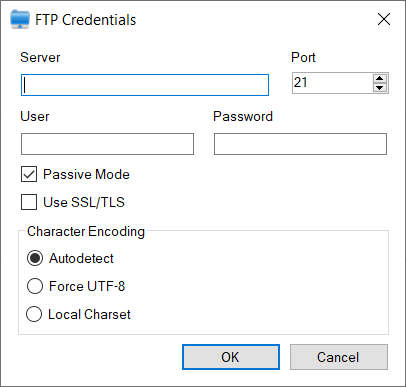
After adding FTP in Air Explorer successfully, you can see all contents in FTP are shown in the interface of Air Explorer. Now you can work with your FTP account uploading and downloading files.
With the Pro version you can add several FTP accounts and even copy and synchronize files between them.
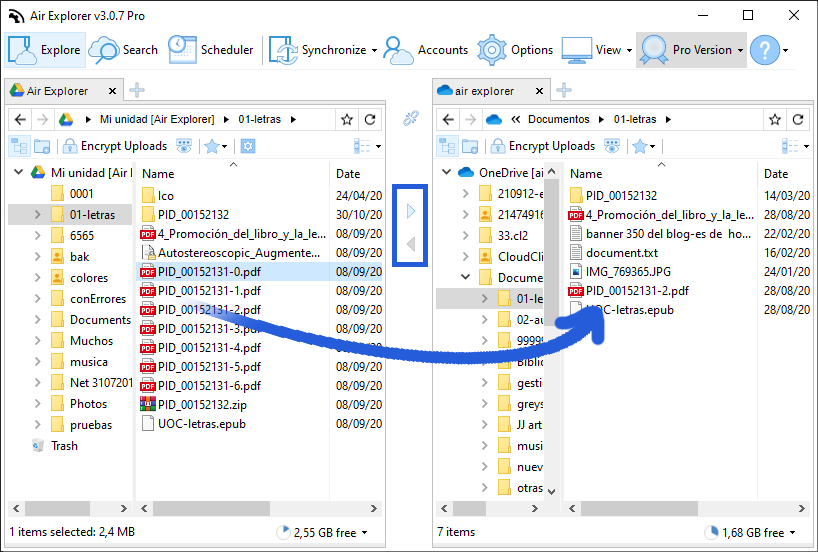
How to copy files from one cloud to another?
Transferring files from cloud to cloud is very easy with Air Explorer.
First you have to add your cloud accounts. Air Explorer supports the most important clouds, you can add all you want and transfer files and folders between them.
Then you have to open one cloud in one window and the other cloud in the other window. No matter the order, you can place one on the right and other on the left.
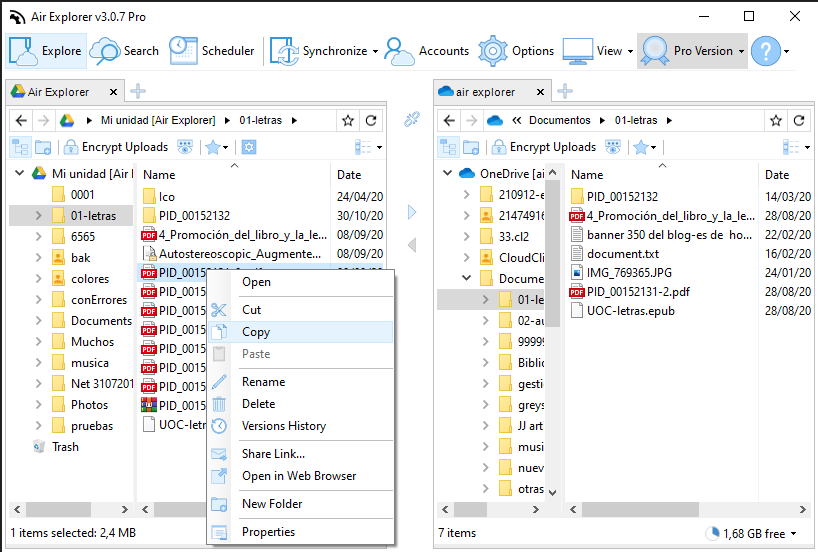
Finally, copy / paste, use the arrows or drag and drop files or folders into the clouds. You can monitor the process at the bottom of the program, here you can follow the transfer progress.
You can check more information here:
-How to copy files from Google Drive to Onedrive?
-How to move files from Onedrive to Google Drive. Monitor the transfer process.
-Transfer files from Mega to other clouds
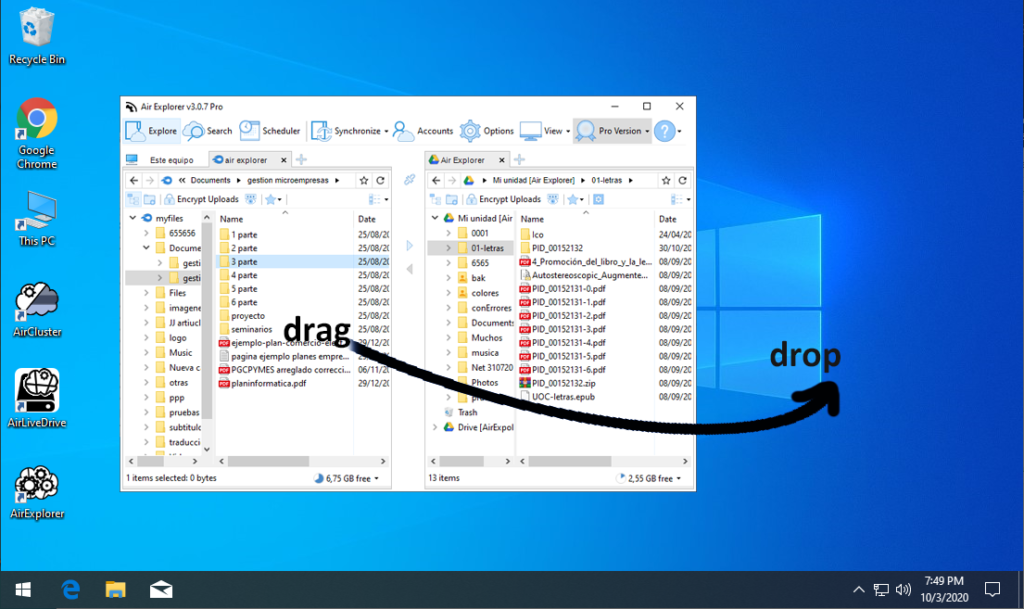
How copy/paste or drag&drop between Air Explorer and Windows Explorer?
When you work with Air Explorer, the program gives you the feature to copy/paste between the clouds that you have open in Air Explorer and the desktop or any folder in your computer.
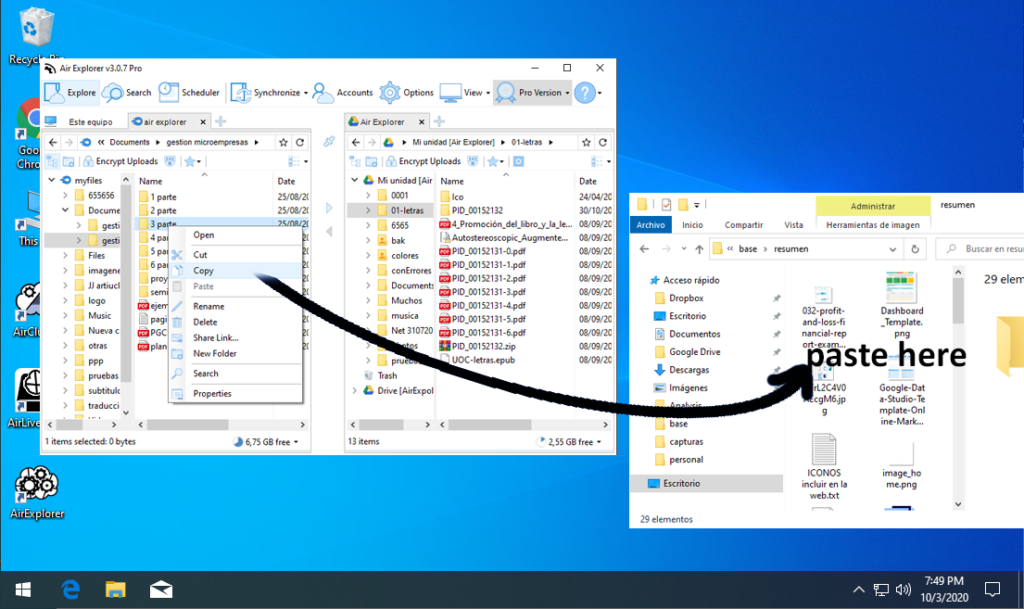
In addition to copy/paste you can drag&drop files and folders directly to the clouds you have open at Air Explorer.
Scheduler function
With the scheduler function of Air Explorer you can leave prepared the tasks of synchronizing and transferring files so that they are done in the schedule that you decide automatically.
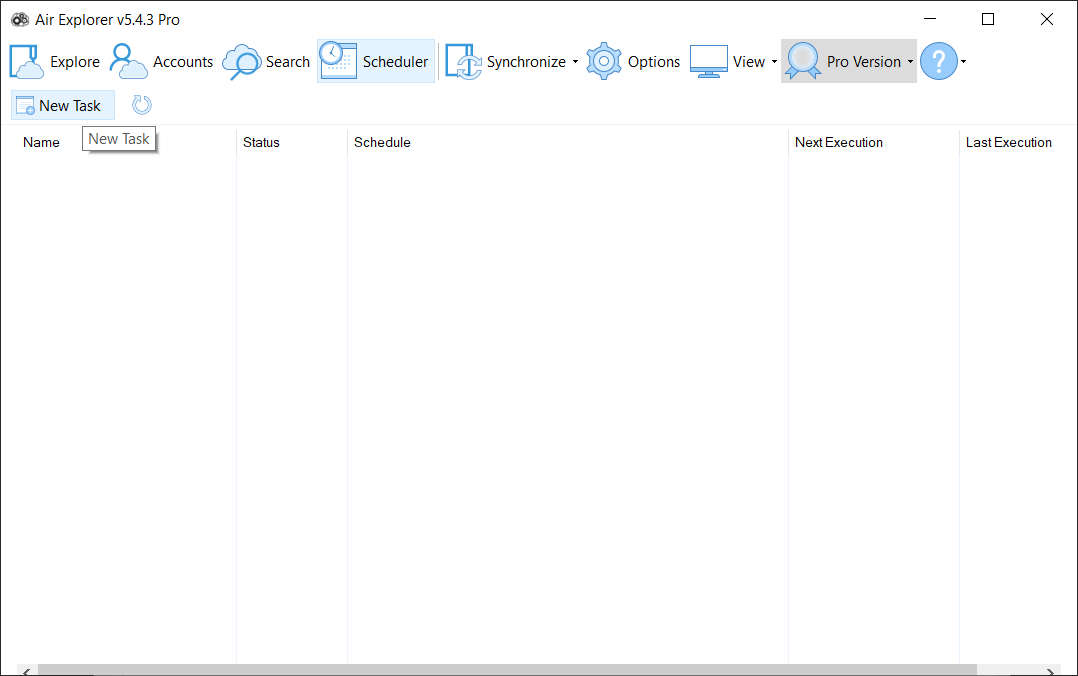
Once you add a new task, the scheduler window will open. In this window you have to specify if you want to schedule a copy or a synchronization.
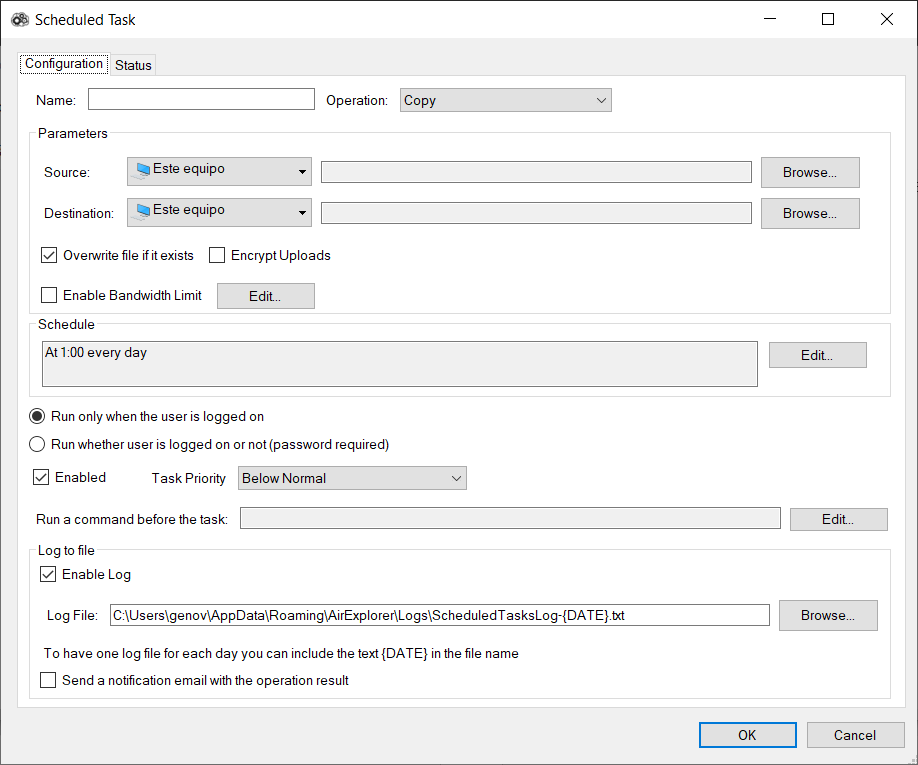
You also have to indicate the schedule in which the task will be carried out.
Once the task is scheduled, in the main scheduler window you will see the task with a brief summary.
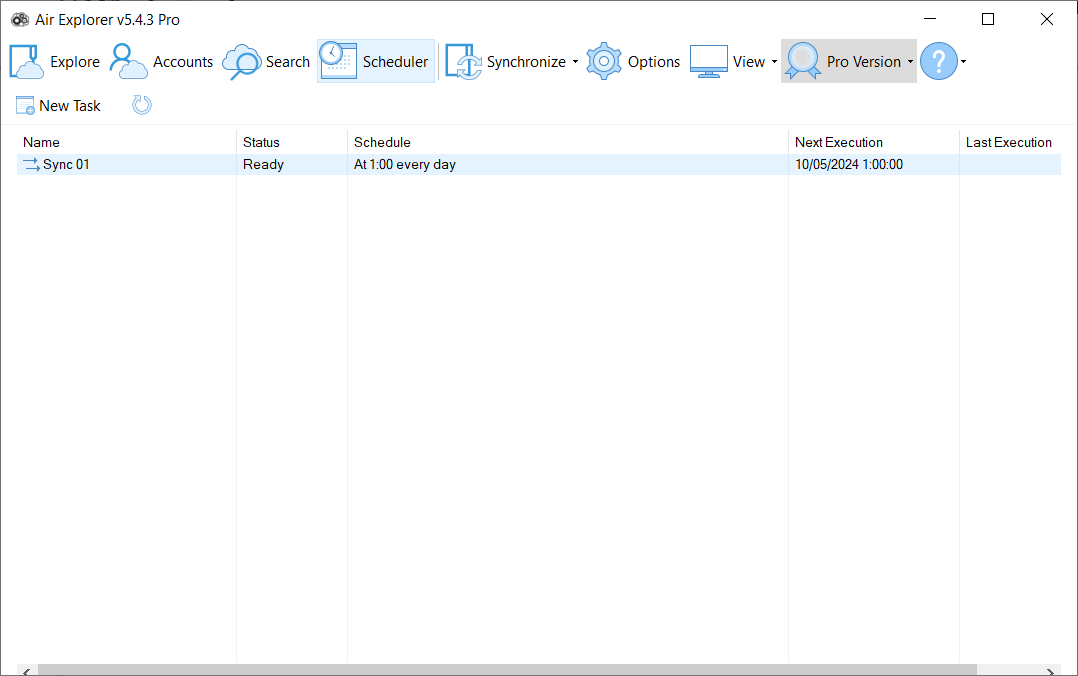
Scheduled tasks will run in the background even if Air Explorer is closed.
You can check more information here:
-Schedule synchronizations in Air Explorer for Mac
How can I encrypt and decrypt files?
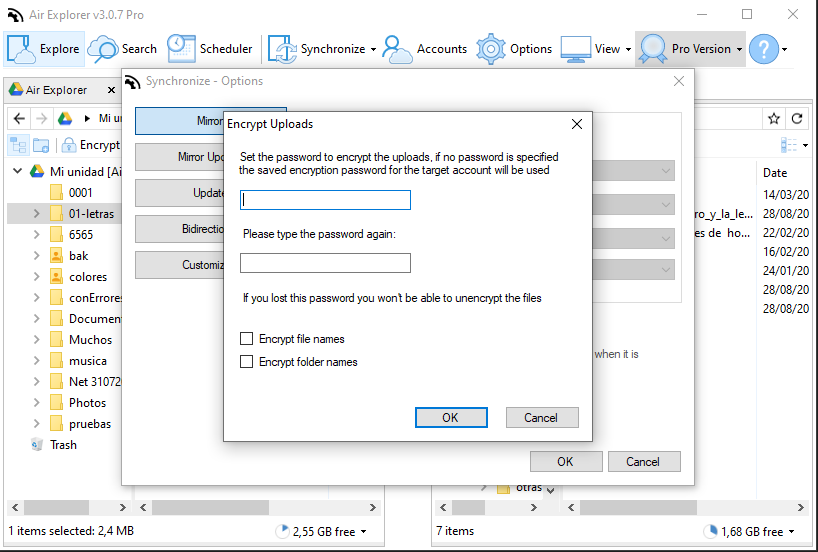
To encrypt a file or a folder, you have to activate the “Encrypt Uploads” button.
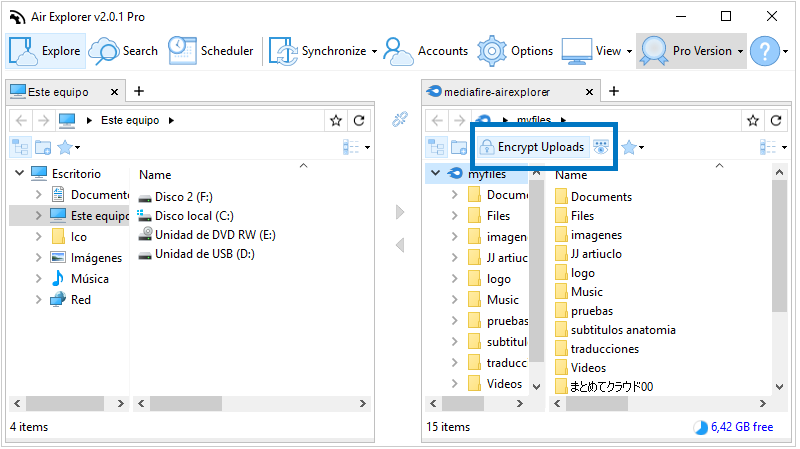
When you transfer a file or a folder, a window asks you about a password that you will need later to decrypt it.
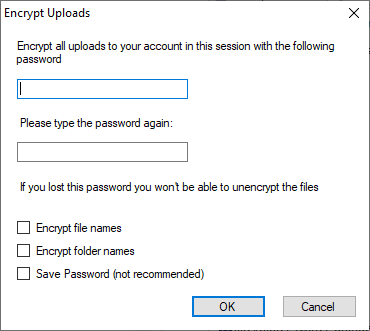
When you download a encrypted file, the software will ask you for a password to decrypt it.
You can check more information here:
-Encrypt files when you upload to the cloud
-Encryption protocol in Air Explorer
How can I synchronize folders?
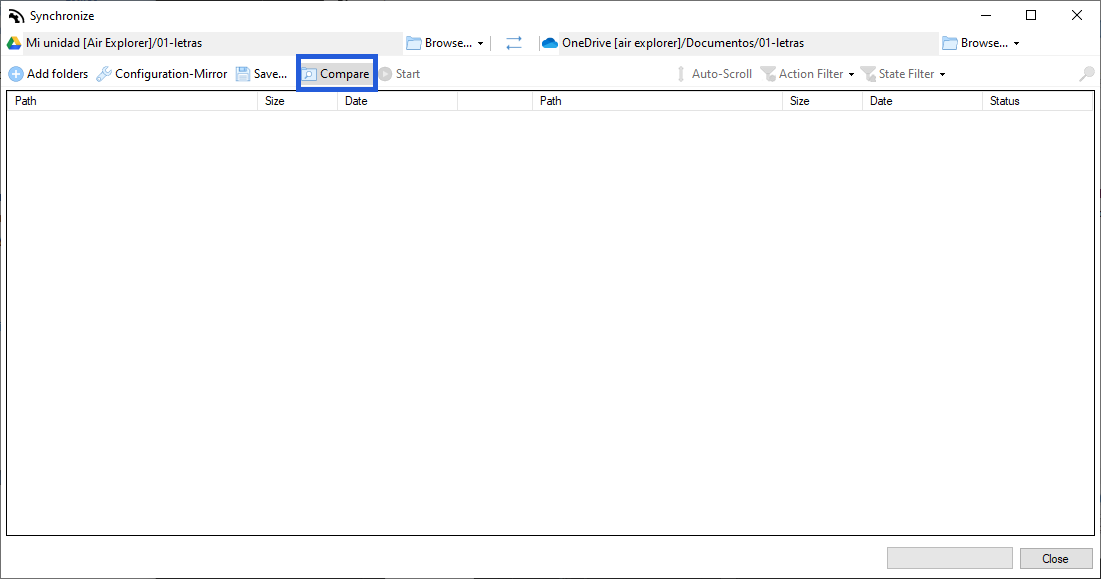
To synchronize folders, first you have to select the two folders to compare, and next, you have to click on the “Synchronize” button.
If you want to make several synchronizations, you have the option of adding another pair of folders to synchronize with the same characteristics as the first one. Folders can be from different clouds or from the same cloud.
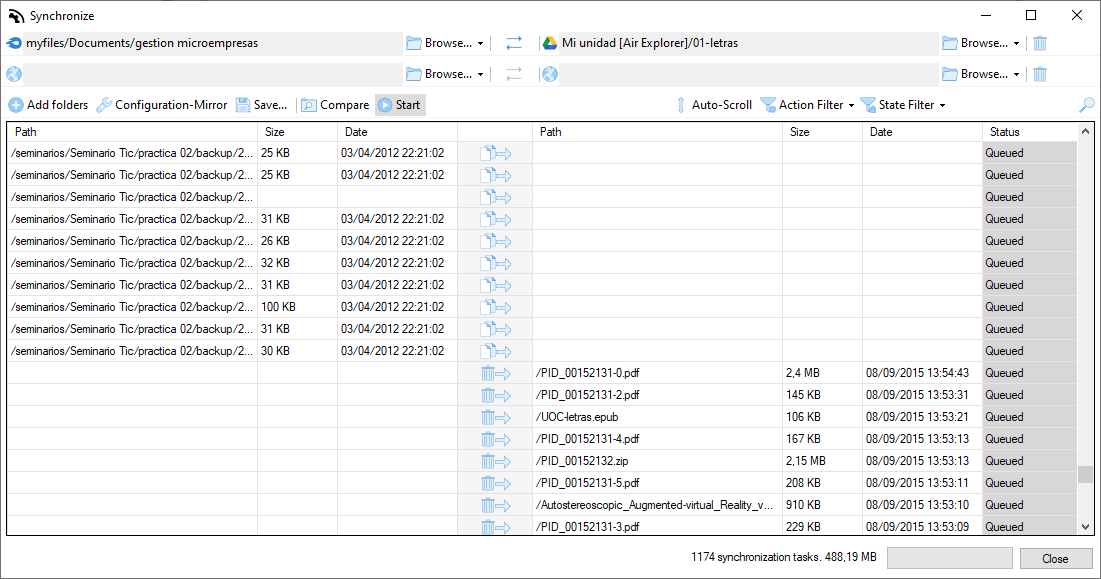
Once the synchronize window is opened, you can select the types of synchronization you want to do.
The types of synchronization available are:
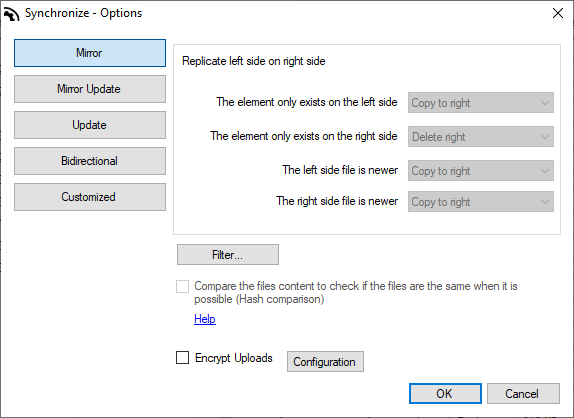
-Mirror: replicate left side on right side.
-Mirror update: replicate left side on right side copyng only newer files.
-Update: copy newer files from left to right.
-Bidireccional: copy newer files to both sides.
-Customized: personalized configuration.
You can check more information here:
-Sharepoint file manager and synchronization tool
-Air Explorer for Mac, for backups and synchronizations
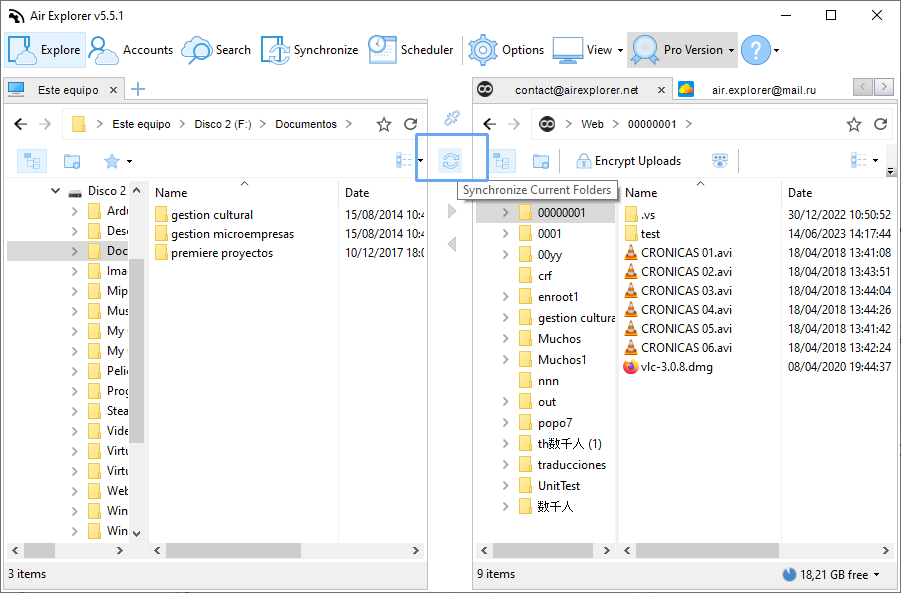
How to synchronization files between my computer and the cloud by encrypting the files when uploading them.
First, select the two folders to compare and then click the “Synchronize current Folders” button.
Once the window is open, you can select the type of synchronization you want to make and if you want to encrypt the files when uploading them. If you choose to encrypt when uploading, a window opens to enter a password. This password will be used to encrypt the files and you will not be able to decrypt them if you lose it.
Once all the settings have been selected and accepted, the synchronization screen opens and you can now click the “compare” button to start the comparison between folders.
You can save the synchronization to run it whenever you want or create a scheduled task to run periodically automatically.
How to exclude files in the synchronization?
To exclude some concrete files it is not necessary to configure some rules, just find the files in the synchronization tasks list and click on the synchronization action icon and select “Do nothing”.
However you can set up rules to exclude multiple files easily. To configure the rules, click on the “Filter” button in the synchronization configuration window.
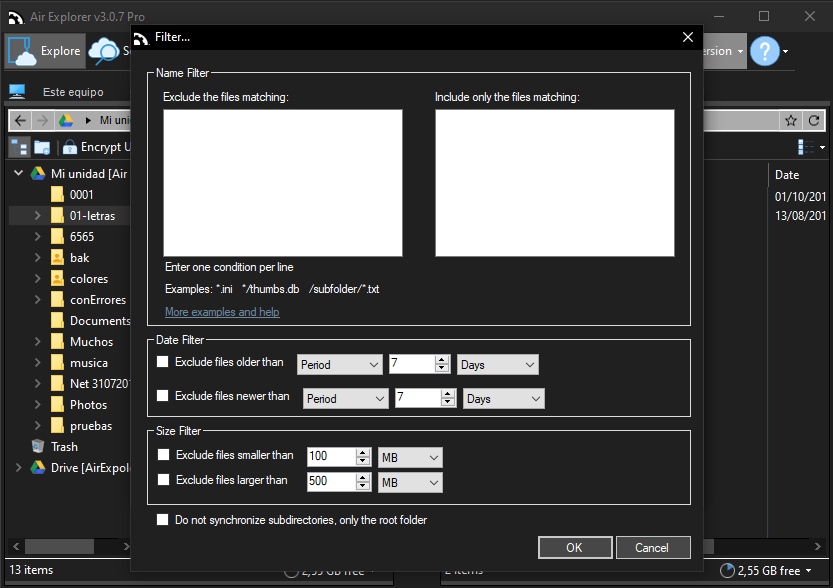
To enter the rules, follow these guidelines:
-Each list item must be a file or directory path relative to synchronization base directories.
-Each item must be in a new line.
-Wild cards * may be used, they mean zero or more characters.
-Always use the charater / for directory separators.
Examples:
-Exclude single file: /file.txt
-Exclude all the mp3 files: *.mp3
-Exclude all files named thumb.db: */thumbs.db
-Exclude all txt files in folder1 and subfolders: “/folder1/*.txt”
-Exclude all files and folders containing “myfile” in the name: *myfile*
Complex regular expressions can also be used, to indicate a regular expression enter it between brackets [ ] You can find more information about regular expressions here:
https://msdn.microsoft.com/en-us/library/az24scfc(v=vs.110).aspx
Regular expression examples:
-Exclude all the txt files: [.*\.txt$]
-Exclude all txt files from the /aaa folder but don’t exclude the txt files in the /aaa subfolders: [^/aaa/[^/]+\.txt$]
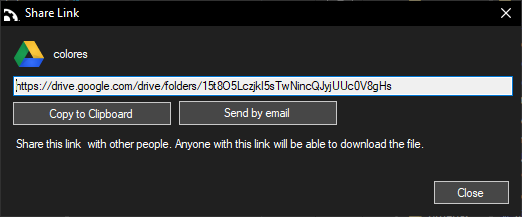
How can I share files?
To share files, right click on the file you want to share and select “Share Link”.
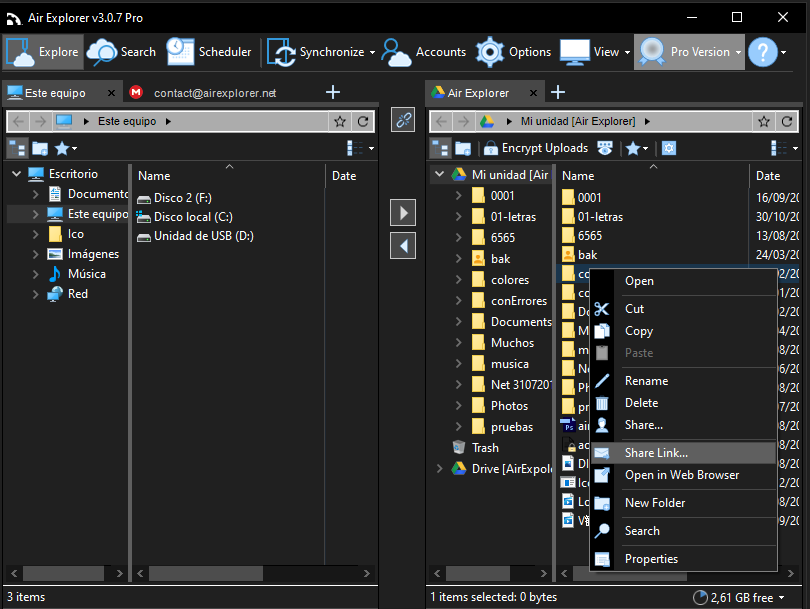
A window will open and will show you the link to share the file. Anyone with this link will be able to download the file.
Manage files in the clouds with Command Line
Air Explorer has a command line client that allows you to perform some operations with the cloud servers without having to open Air Explorer. It can be very useful to automate file transfers,synchronizations, etc, in batch jobs that can run automatically.
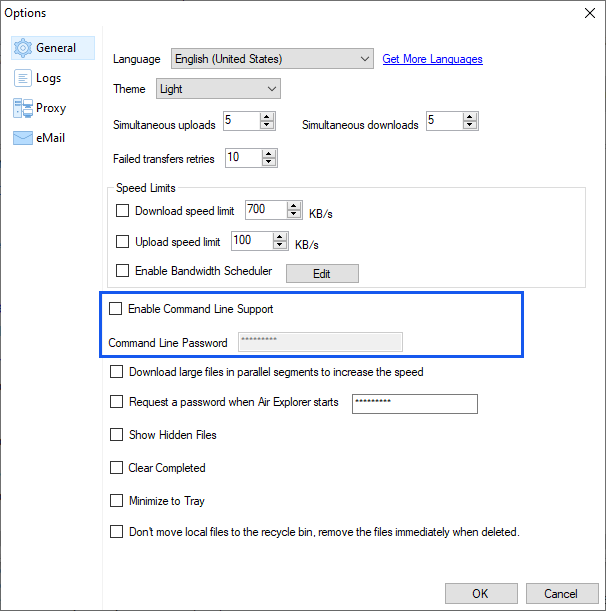
The first step is to activate this function in the Options screen. It is only available for Pro accounts. Remember to add your command line password.
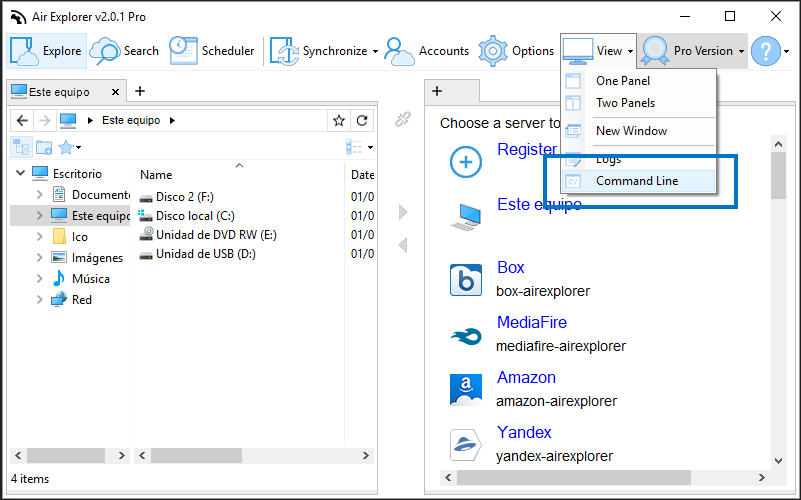
To access the command line window you can open the CMD from the start menu or from the shortcut in the “View” menu.
Available operations are:
-Accounts: list all the accounts defined in Air Explorer.
-Copy: copies a file or a folder to another location in a cloud server.
-Delete: deletes a file or a folder in a cloud server.
-dir: list all the files and folders in a cloud server folder.
-Download: downloads a file or a folder to a local folder.
-Mkdir: creates a new folder in a cloud server.
-Move: mover a file or a folder to another location in a cloud server.
-Quota: shows the used and free space in a cloud server.
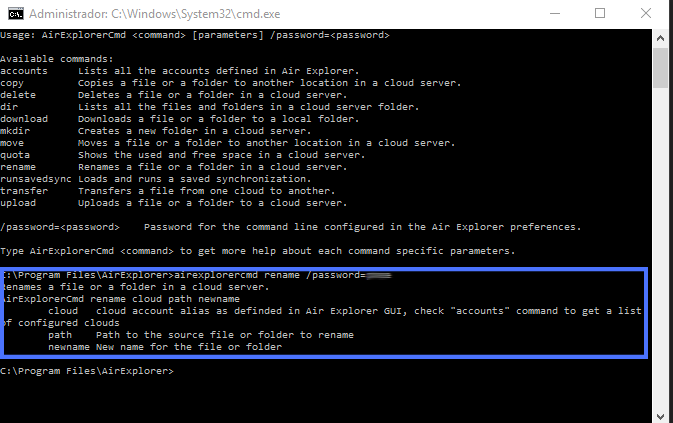
-Rename: renames a file or a folder in a cloud server.
-Runsavedsync: loads and runs a saved synchronization.
-Transfer: transfer a file from one cloud to another.
-Upload: uploads a file or a folder to a cloud server.
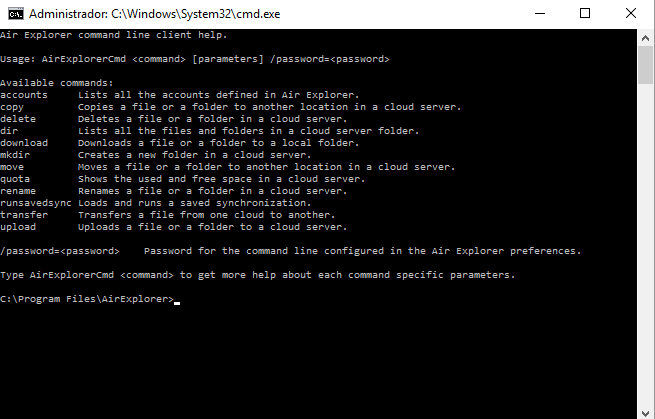
To run the operations you can follow the instructions shown on the command line panel.
For example you will be able to run commands like this one:
AirExplorerCmd.exe upload “fileName.doc” “MyBoxAccount” “/documents” /password=****To upload a file (fileName.doc) to a cloud server (Box) in a specific destination folder in the cloud (/documents).