
Schedule synchronizations in Air Explorer for Mac
In the last version of Air Explorer for Mac, we have added the command line support. Thanks to it, you can schedule tasks like synchronizations, copy files, move files between clouds,…
If you want to schedule a synchronization task with Air Explorer, here you have the instructions to do it.
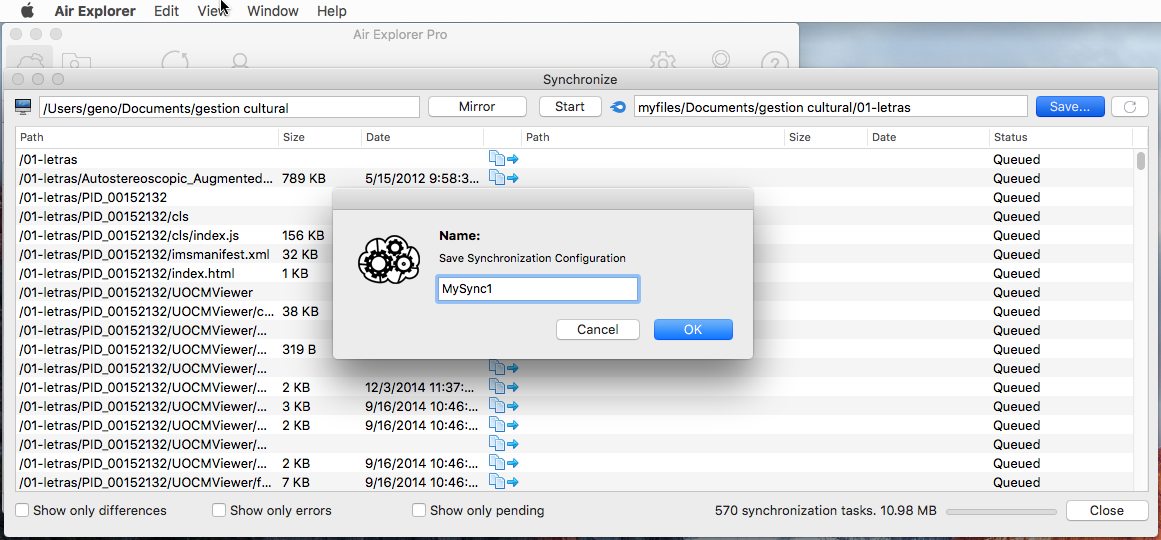
Firts of all, you have to create a synchronization in Air Explorer and save it with a name, for example “MySync1”
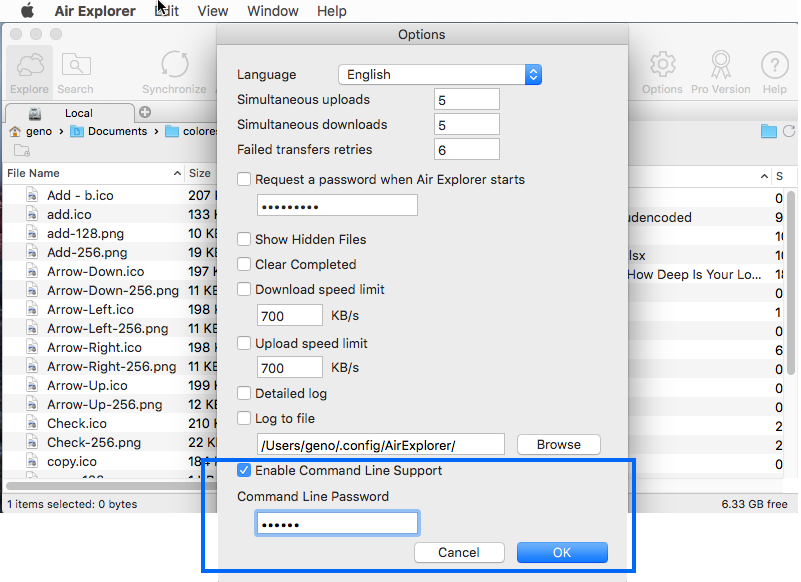

In Air Explorer options you have to enable command line suport and write a command line password, ej: mypass
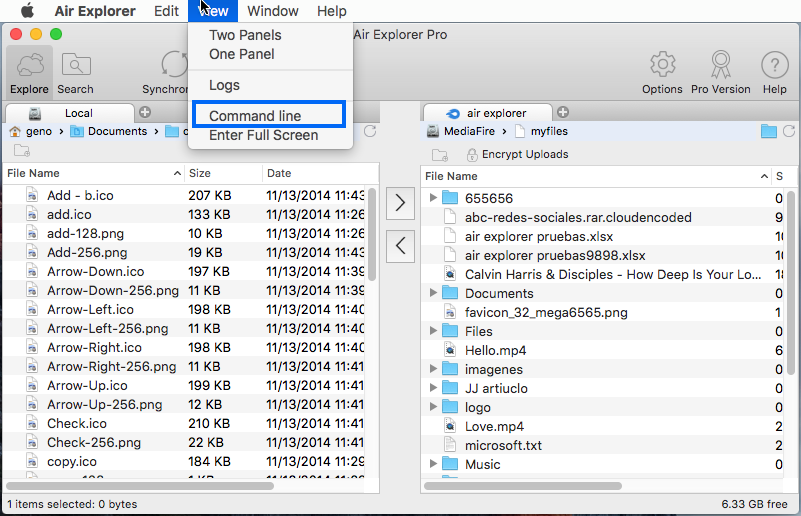
Open the command line screen from Air Explorer: View/Command line
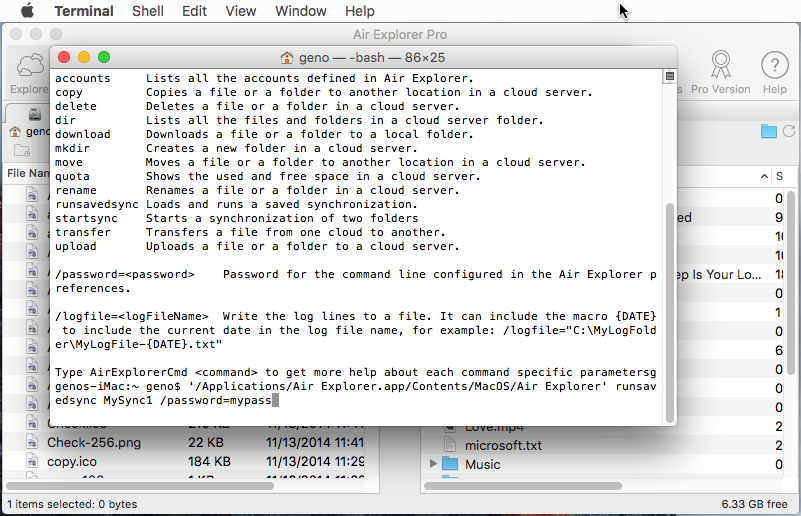
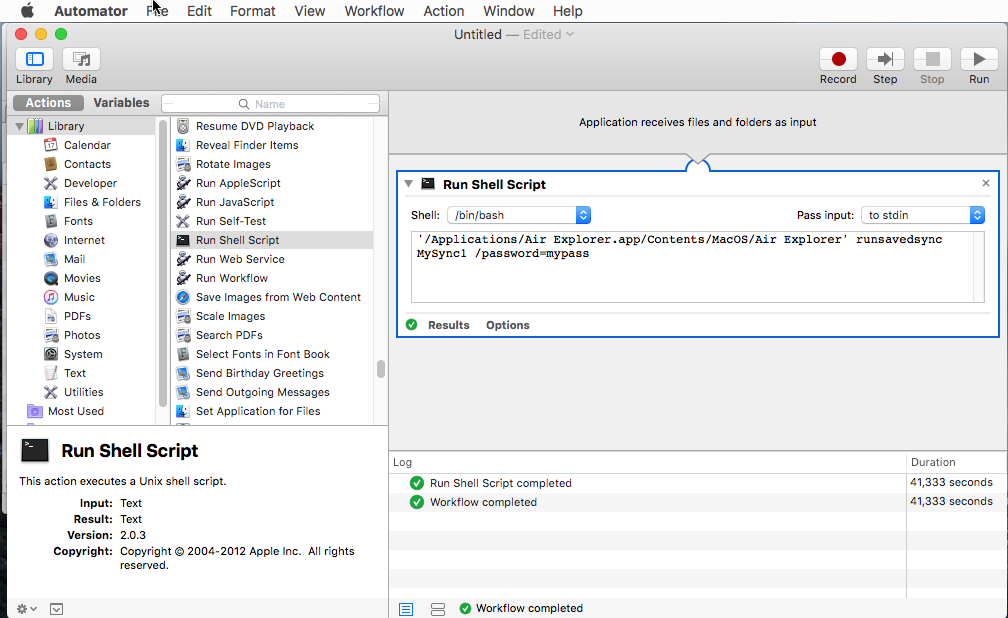
You can run the synchronization with the command runsavedsync, ex:
‘/Applications/Air Explorer.app/Contents/MacOS/
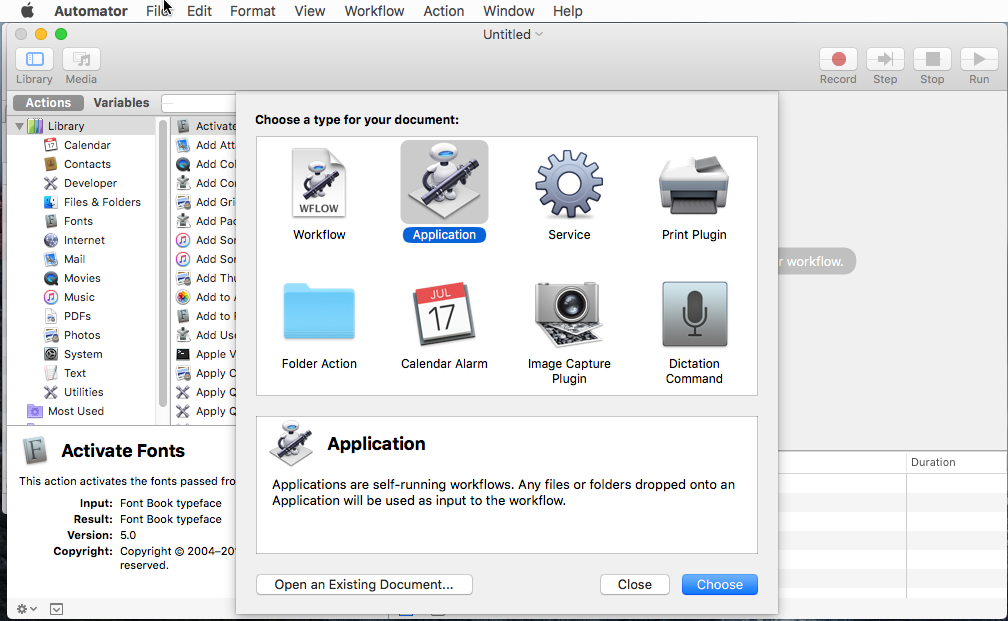
If it was executed well, now we have to schedule it. For this, we have to create a task using “Automator”. You can find this in “Applications” on the Dock of your Mac. Then click “Automator” to launch Apple’s native program for automating tasks.
The Automator window appears, then you have to click “Application” to create a new empty Automator application window.
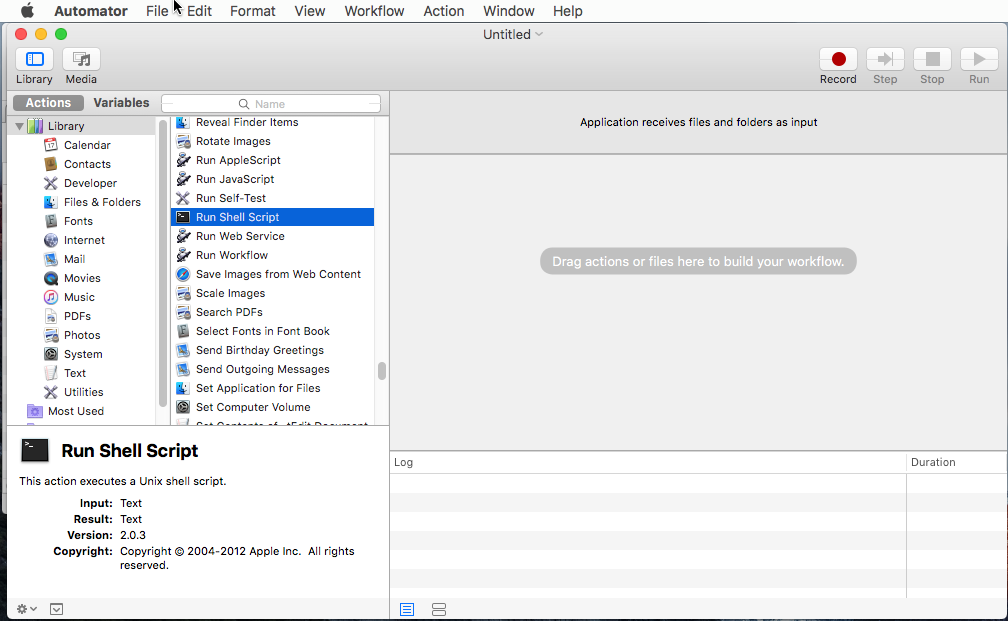
A list of actions appears in the library in the left pane of the Automator window. You have to search “Run Shell Script” and double click on.
Paste your synchronization command we used before. You can click on Run if you wish to test it again.
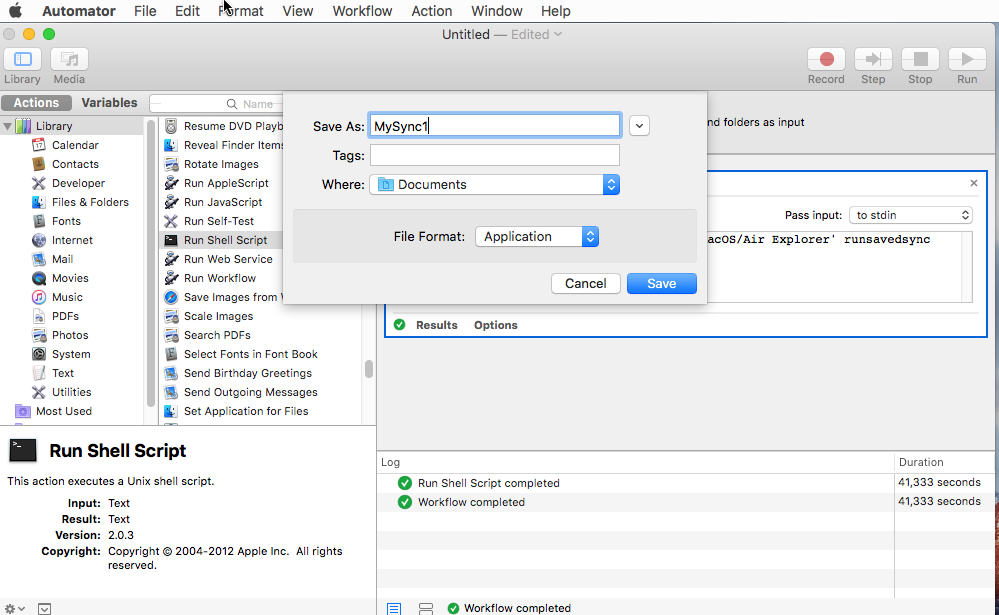
Now, you have to save the automator task (File/ Save) in a folder (ex: Documents) and give it a name, ex: MySync1
Then, you can close automator.
To schedule the Automator task we can use Calendar or another external tool like Scheduler.
Option 1: using Calendar:
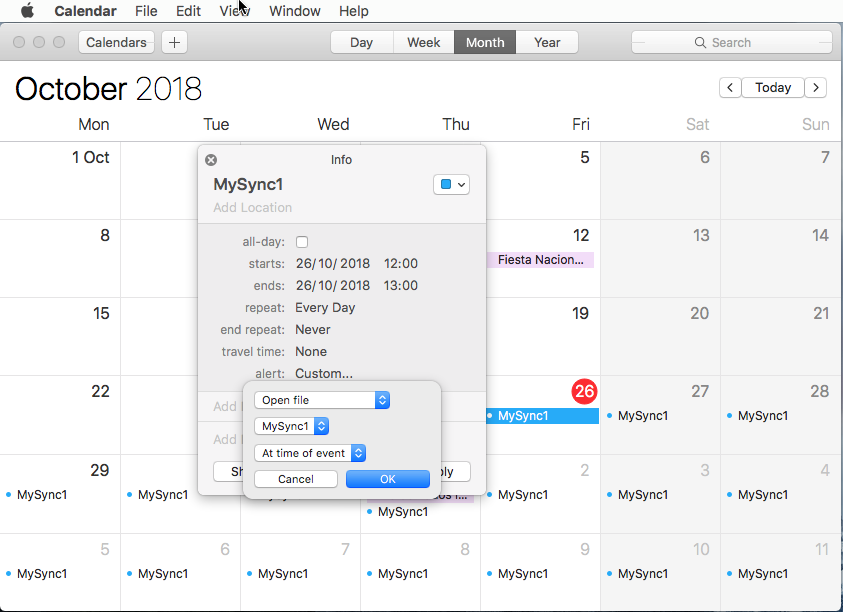
Open Calendar and “Add new event”, give it a name, for example MySync1, change repeat period, for example “Every day” and the start time depending on when you want to run the synchronization, in Alert select “Custom…”, select “open file”, select “other” to select the file you saved with the automator. Select “At time of the event”.
Now the task is ready, the first time it will run it will ask for permission.
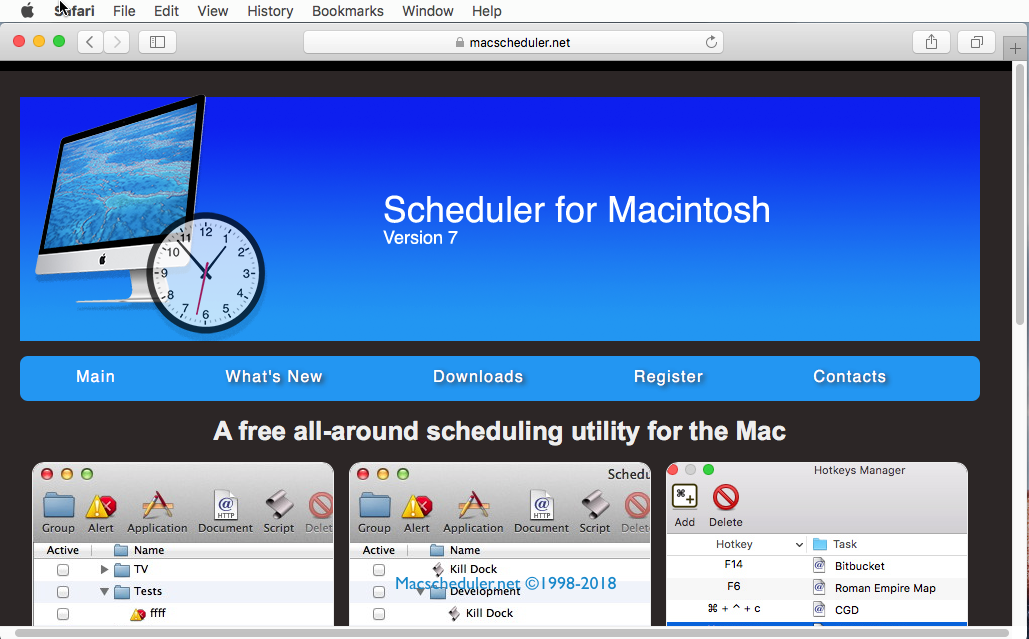
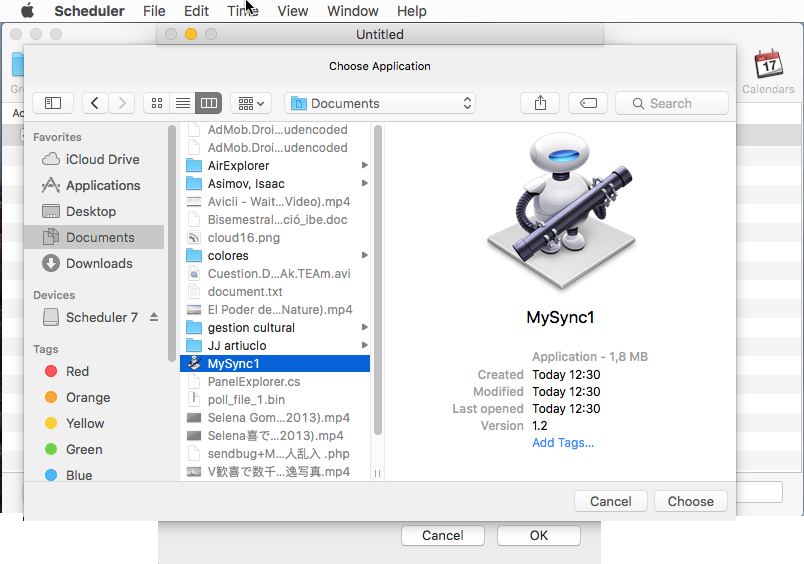
Option 2: using Scheduler
Download and install Scheduler from here:
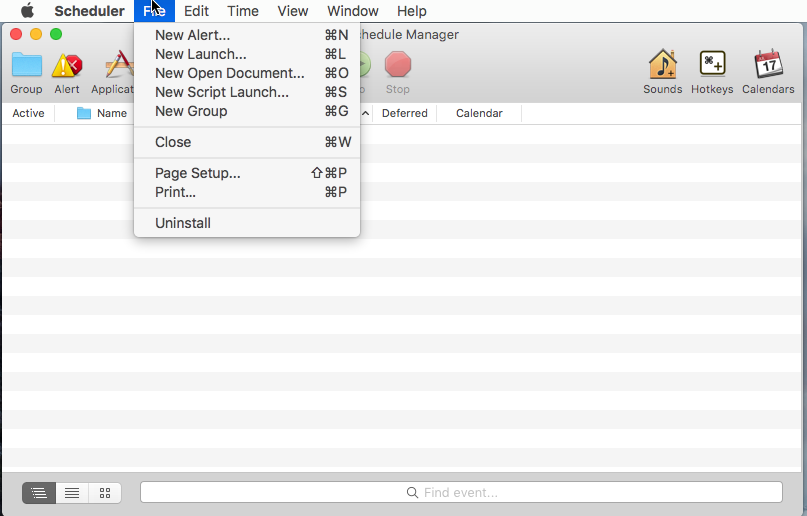
Open “Scheduler” and select File/New Launch.
Set the time when you want to run the synchronization.
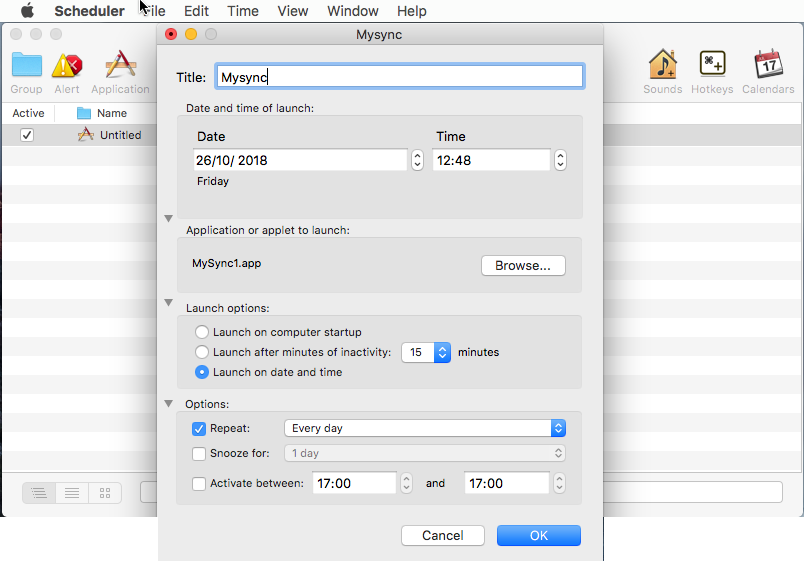
In Application or applet to launch, you have to browse to select the file saved with the Automator.
Check “Repeat” if you want to run the synchronization for example every day and finally click OK.
You can check more information here:
-Air Explorer for Mac, for backups and synchronizations
