
How to use the synchronization tool
- Cloud storage vs synchronization
- Use a cloud sync software like Air Explorer
- Synchronization screen
- Schedule your synchronization
Synchronization Pc-to-cloud and cloud-to-cloud represents an essential mechanism in the digital age ensuring that data stored on a personal computer’s local hard drive is aligned and in agreement with its replica on a cloud storage platform. This integration offers multiple advantages, including:
- Access from anywhere: You can access your files from any device with an Internet connection.
- Automatic backups: The cloud automatically backs up your files, protecting against data loss.
- Collaboration: You can share files with other users and work on joint projects.
Considering that nowadays having an account in a cloud storage service is very common, sync our files with the cloud and taking advantage of the benefits it brings is a very simple process.
Cloud storage vs synchronization
Before starting to make use of cloud storage services, such as Google Drive, Box or Dropbox, it should be noted that there is a differentiation between cloud storage and synchronization, both are important concepts in the management of digital data and each has a different purpose.
As for cloud storage, its main function is to save data in the cloud to have them accessible through the Internet, it is like a virtual hard drive. On the other hand, when we synchronize our data with the cloud, we focus on maintaining data consistency between the computer and the cloud, ensuring that both places reflect any changes.
The most common case of using synchronizations is when backing up files from the computer to the cloud and even backing up from one cloud to another. Depending on how we want to use the cloud, we will choose one or another way of working.
Use a cloud sync software like Air Explorer
Popular cloud synchronization services such as Dropbox, Google Drive and Onedrive offer automatic synchronization and access from multiple devices. However their configuration, if you want to customize and schedule synchronization, can be complicated. To make it easier to manage cloud accounts and manage synchronizations and their schedules you can use a cloud sync software like Air Explorer. This program allows you to add all your cloud accounts, manage them all from here. And, in addition, you can create all the synchronizations you need, between PC and cloud or between clouds.
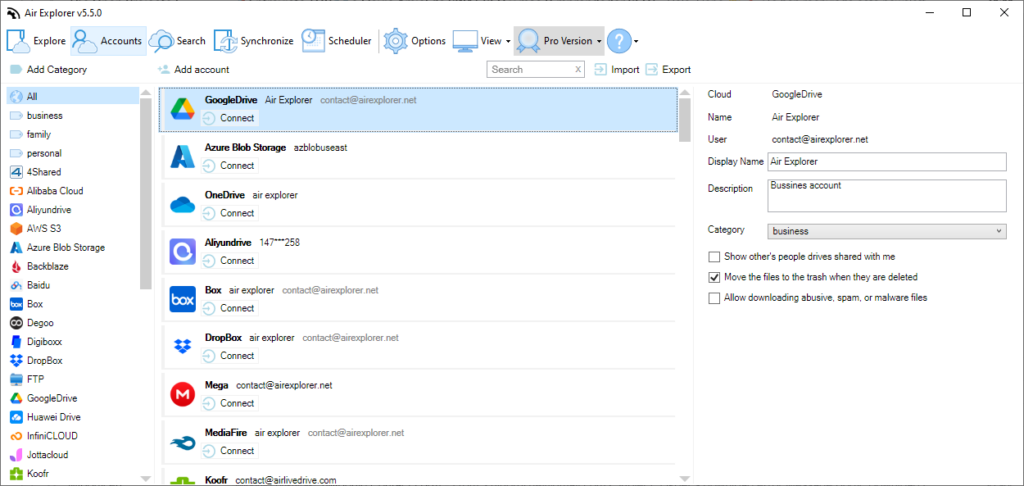
From the Accounts tab of Air Explorer, once you have added your cloud accounts, you can manage the accounts, create an alias to find them better, add a description and choose the characteristic options of each cloud.
From the Explore tab, you can access and manage your cloud accounts, create cloud folders, rename them, copy and paste files, and so on. With this tab, the task of storing your files in the cloud and having them accessible from anywhere with Internet is very easy.
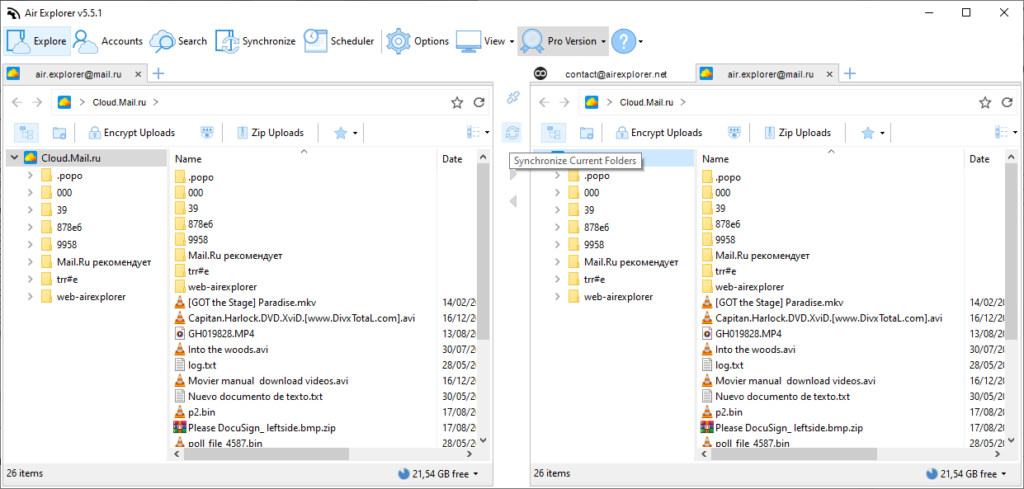
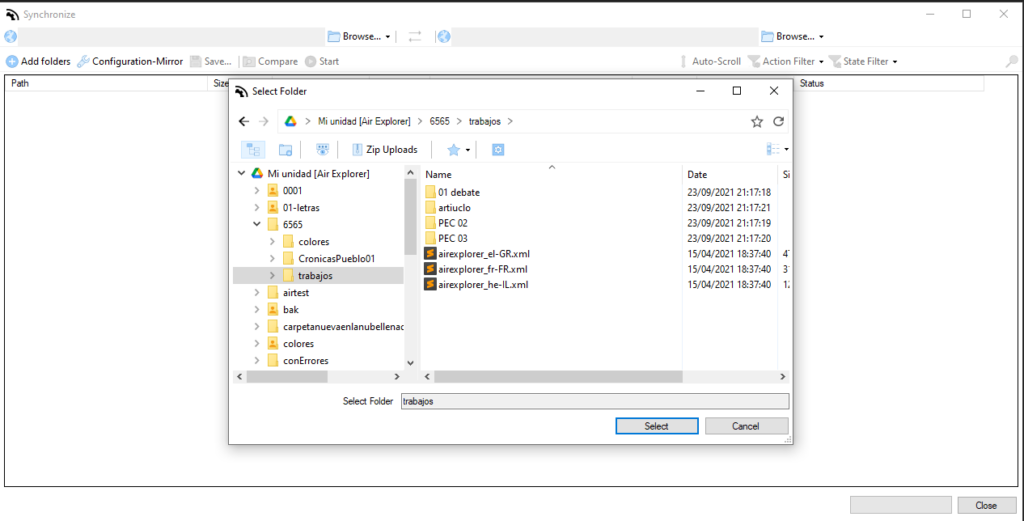
From this screen you can also create a new synchronization. Open the source folder on one side and the destination folder on the other, then click on the ‘Synchronize current folders’ button to create the synchronization.
Synchronization screen
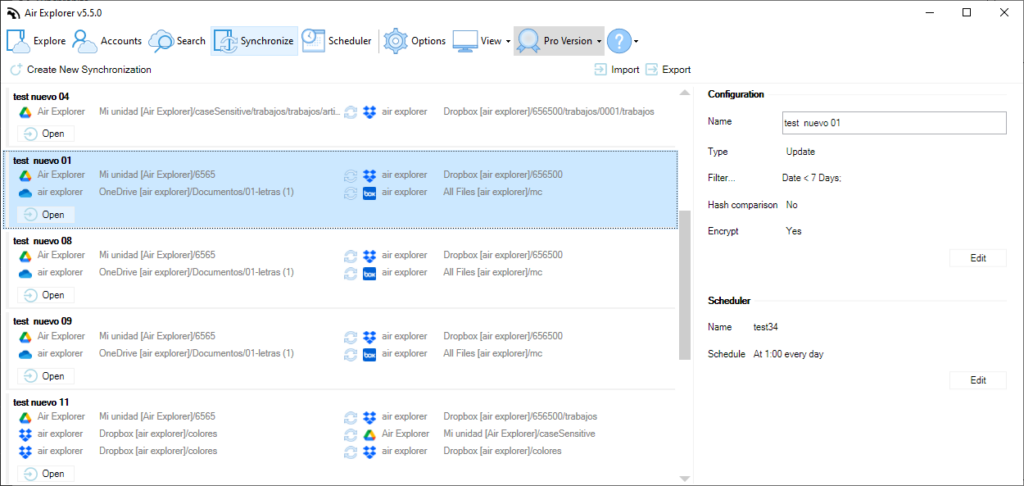
From the Air Explorer Synchronizations tab, you can create new synchronizations, easily view all the synchronizations you have saved and see on this same screen the characteristics of each synchronization, what is the type of synchronization, if it is encrypted on upload and if a schedule has been made.
To create a synchronization from the Synchronization tab, just click on the Create a new synchronization button, then the window for configuring the synchronization will open. In this window you choose the cloud or folder of the source PC and the destination cloud.
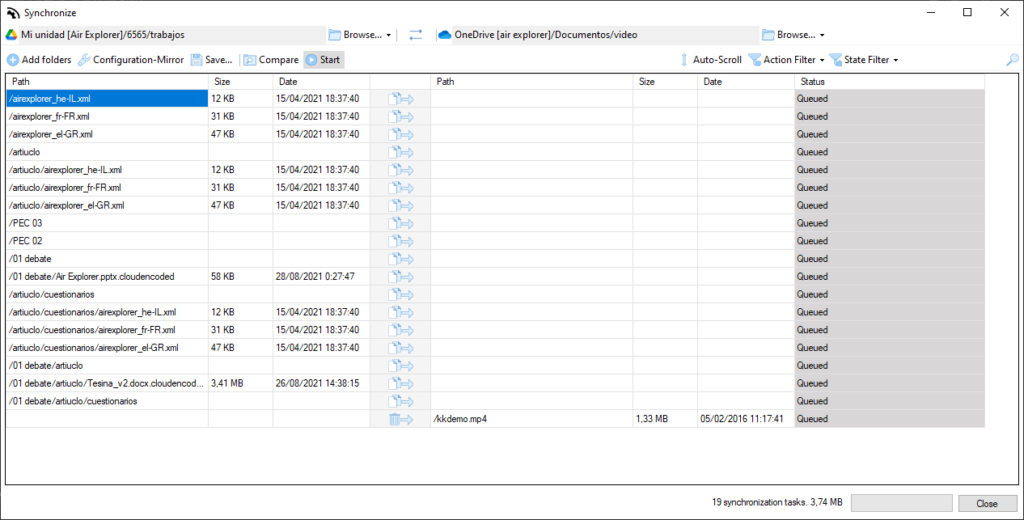
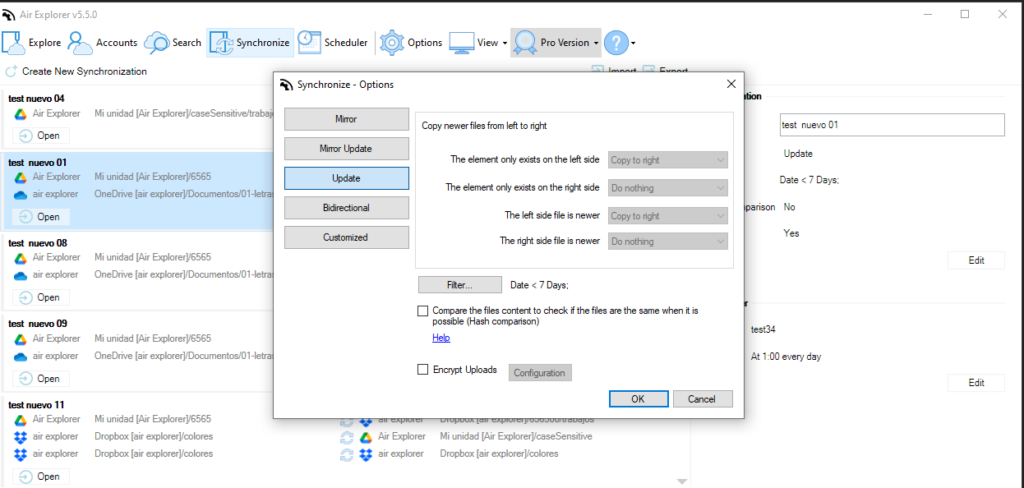
The next step to create the synchronization is to choose the type of synchronization (mirror, updated, updated mirror, bidirectional or custom). And, once created and configured you can save it to repeat it again. When it is ready, you press the Compare button to make a scan of the source and destination folders. After finishing the comparison and confirming the actions to take, click on the Start button to begin the synchronization.
When we have the synchronizations created and saved, in the Synchronization tab we can see them listed. And, from the list, we can review and modify them. We can edit the type of synchronization.
Schedule your synchronization
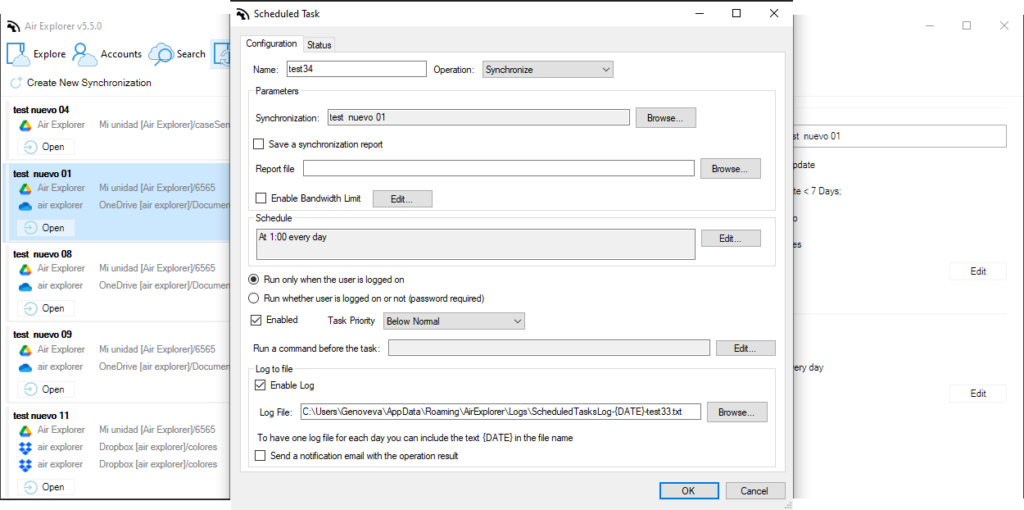
Also from the Synchronization tab we can modify the synchronization schedule. A good synchronization schedule is essential to automate the process of keeping your files up to date between your PC and the cloud or between cloud and cloud. With Air Explorer you can configure numerous scheduling parameters to set the frequency of synchronizations.
In short, Air Explorer allows you to store your data in the cloud from the Explore tab and create synchronizations from the Sync screen. By synchronizing your PC with the cloud or between clouds, you can have a backup accessible from anywhere, ensuring your files are up to date and giving you peace of mind.
You can check more information here:
-Transfer Dropbox files to Google Drive
-Encrypt Google Drive files
-How to upload files to the cloud on Mac
