Manage your cloud files using the command line

Air Explorer is a versatile application that allows you to manage multiple cloud storage services from one interface. In addition to its graphical interface, Air Explorer also offers a command line that allows you to perform various operations without opening the application.
In general, the command line is a tool that can be useful when working with any program in Windows or Mac. Some of the reasons to use it are:
- Automation and scripting: The command line allows you to automate repetitive tasks using scripts. You can write a set of commands in a script file and execute it to perform specific actions without manual intervention.
- Access to advanced tools: Some advanced tools and utilities are only available through the command line.
- Greater control and flexibility: The command line provides more precise control over operations. You can specify specific options and parameters to customise the execution of a program.
- Efficiency and performance: In some cases, the command line can be faster and more efficient than graphical interfaces. It requires no graphical resources and can run in the background without affecting overall system performance.
Air Explorer’s command line allows you to automate tasks
In the case of Air Explorer, the command line allows you to interact with your cloud storage accounts without opening the main application. It also allows you to automate tasks such as uploading files, syncing folders or downloading content. You can also create custom scripts to perform various operations.
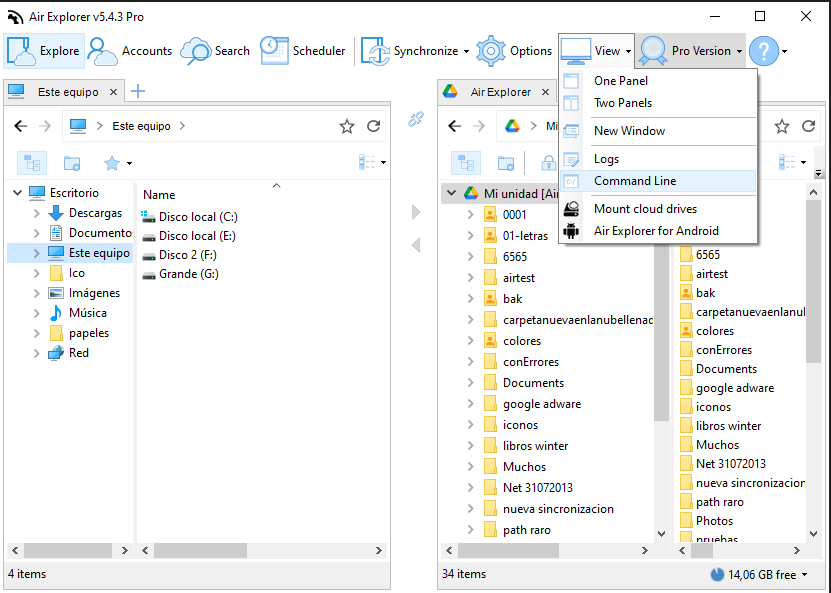
After installing Air Explorer and adding your cloud accounts, you can start working in the command line by going to View/Command Line. And, once you access the command line screen you will be able to interact with your accounts from here.

With Air Explorer, you have the ability to manage all your cloud storage accounts directly from the command line. Air Explorer simplifies the management of your files on services such as Google Drive, OneDrive, Dropbox, Mega, Box and others. You no longer need to switch between different applications or graphical interfaces, with Air Explorer’s command line, you can perform tasks such as uploading, downloading and synchronizing files efficiently.

Air Explorer command list
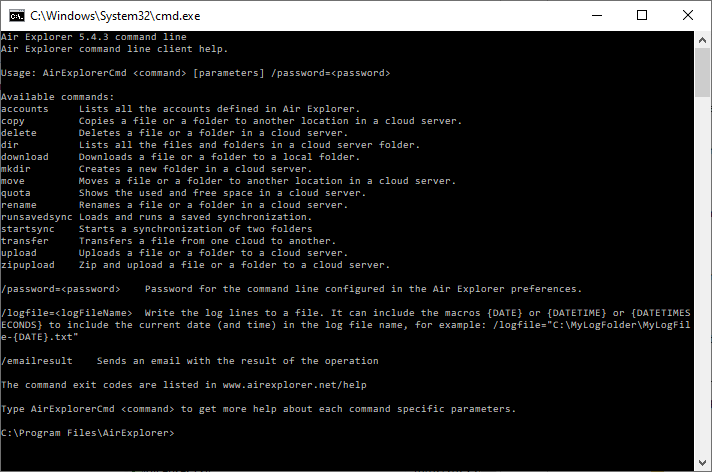
In the command line help screen you can see the commands list for Air Explorer:
- accounts: list all the account defined in Air Explorer.
- copy: copies a file or a folder to another locations in a cloud server.
- delete: deletes a file or a folder in a cloud server.
- dir: lists all the files and folders in a cloud server folder.
- download: downloads a file or a folder to a local folder.
- mkdir: creates a new folder in a cloud server.
- move: mover a file or a folder to another location in a cloud server.
- quota: shows the used and free space in a cloud server.
- rename: renames a file or a folder in a cloud server.
- runsavedsync: loads and runs a saved synchronization.
- startsync: starts a synchronization of two folders.
- transfer: transfers a file from one cloud to another.
- upload: uploads a file or a folder to a cloud server.
- zipupload: zip and upload a file or a folder to a cloud server.
In addition, with the Air Explorer command line you can save a log with the results of each command. So, for example, if you have automated commands, once they are executed, you can check the log and see that they have been executed correctly.
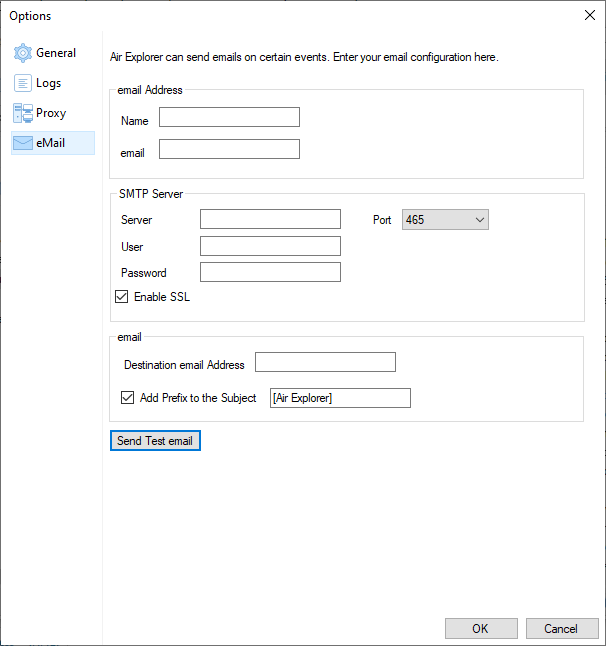
If you have added an email address in the program configuration, you can have the log sent to this email address. For example, if you do a synchronization via the command line, you can receive in the email all the details to see if it was done correctly. You can also see if there have been any errors, so you can easily make sure that a backup has been done correctly.

In summary, although the graphical interface of Air Explorer is more user-friendly for many users, on the other hand, the command line is still an essential tool for those who want more control and efficiency when working with Air Explorer on Windows or Mac.
You can check more information here:
-Transfer Dropbox files to Google Drive
-Encrypt Google Drive files
-How to upload files to the cloud on Mac

