How to upload files to the cloud on Mac

- Introduction
- Uploading files to iCloud
- iCloud alternatives: uploading files to Google Drive and others
- Setting up third-party cloud management software on Mac
1,Transmit
2,FileZilla
3,Air Explorer - Uploading files to the cloud using Air Explorer
1.Uploading files
2.Synchronizing files - Conclusion
Introduction
Cloud storage has transformed the way we store, access, and manage data, offering numerous benefits such as accessibility, scalability, and enhanced security. By uploading files to the cloud, users can access their files from any device with an internet connection, ensuring that important documents, photos, and other files are always within reach. This is particularly beneficial for Mac users, who often rely on seamless integration across their Apple devices.
For Mac users, cloud storage is crucial for maintaining synchronization between their MacBooks, iPhones, and iPads. Services like iCloud, Google Drive, Dropbox, and OneDrive provide robust solutions for storing and sharing files, making it easy to keep data up-to-date across multiple devices. iCloud, in particular, offers deep integration with macOS and iOS, allowing for effortless backup and synchronization of photos, documents, and app data.

However, managing multiple cloud storage accounts can be challenging, especially for users who utilize more than one service. This is where third-party cloud management software becomes invaluable. These tools help Mac users efficiently manage their cloud storage, providing a centralized interface to access and organize files across different services.
Popular third-party cloud management software options include Air Explorer, Transmit and FileZilla. Air Explorer supports multiple cloud services and offers features like file synchronization and encryption. Transmit is known for its user-friendly interface. FileZilla, primarily an FTP client, also supports cloud storage management.
By leveraging these tools, Mac users can ensure their data is always organized, accessible, and secure.
Uploading files to iCloud
iCloud is Apple’s cloud service that securely stores your photos, files, notes, passwords, and other data, keeping it up to date across all your devices automatically. To use iCloud, sign in with your Apple ID on your device, then select the apps and features you want to sync. You can access your data on any Apple device, a Windows computer using iCloud for Windows, or via a web browser at iCloud.com. iCloud also offers sharing and collaboration features, making it easy to share content with friends and family.
iCloud alternatives: uploading files to Google Drive and others
However, there are alternatives to using iCloud. All other cloud storage services can also be used on Mac devices. The Mac user can use the iCloud service or expand with other cloud storage services. Services like Google Drive, Dropbox, Mega, Box and OneDrive are very efficient alternatives that allow you to have your files stored in the cloud without taking up space on your Mac devices.
For example, using Google Drive on a Mac is quite straightforward. Here are the steps to get you started:
- Download and Install Google Drive for Desktop:
-Open your web browser and go to the Google Drive download page.
-Click on “Download Drive for desktop” and follow the instructions to install it on your Mac. - Sign In and Set Up:
-Once installed, open the Google Drive app from your Applications folder.
-Sign in with your Google account credentials.
-Follow the prompts to set up your preferences, such as which folders to sync. - Sync Your Files:
-You can choose to sync your entire Google Drive or select specific folders.
-Google Drive will appear in your Finder under “Locations,” allowing you to access your files directly from your Mac. - Using Google Drive:
-You can drag and drop files into the Google Drive folder in Finder to upload them to the cloud.
-Any changes you make to files in this folder will automatically sync with your Google Drive account online
You can also use Google Drive to collaborate on documents, share files with others, and access your files offline.
Other storage services such as Dropbox, Mega, Box and OneDrive work in a similar way and the configuration is also very similar.
Setting up third-party cloud management software on Mac
Using the applications of storage services is very simple but sometimes not very intuitive. In addition, certain advanced functionalities are sometimes missing to facilitate daily tasks. In these cases, in order to connect to the cloud and upload our files, we can resort to third-party programs. Transmit, FileZilla and Air Explorer are all software that allow you to connect to your clouds, upload files and perform more advanced tasks that make working in the cloud more effective.

1. Transmit
Downloading and installing Transmit on your Mac is straightforward: visit the official website, download the installer, and follow the on-screen instructions. Once installed, you can easily add and manage multiple cloud accounts such as Google Drive, Dropbox, and OneDrive by navigating to the “Accounts” section. Transmit’s key features include a user-friendly interface with drag-and-drop functionality, robust synchronization options, and automation tools for efficient file management.
The disadvantage of Transmit is that it has very limited support for cloud storage accounts.
2. FileZilla
To install FileZilla on your Mac, download it from the official website and follow the installation instructions. Configuring cloud storage connections involves opening FileZilla, selecting “Site Manager,” and entering your cloud service credentials (e.g., for Google Cloud Storage or Amazon S3). The FileZilla interface is user-friendly, featuring a dual-pane layout for local and remote files, a Quick Connect bar for easy access, and options for uploading, downloading, and managing files.
The disadvantage of using Filezilla, as with Transmit, is that it does not support a large number of clouds. Filezilla only supports Dropbox, Microsoft OneDrive and Google Drive.
3, Air Explorer
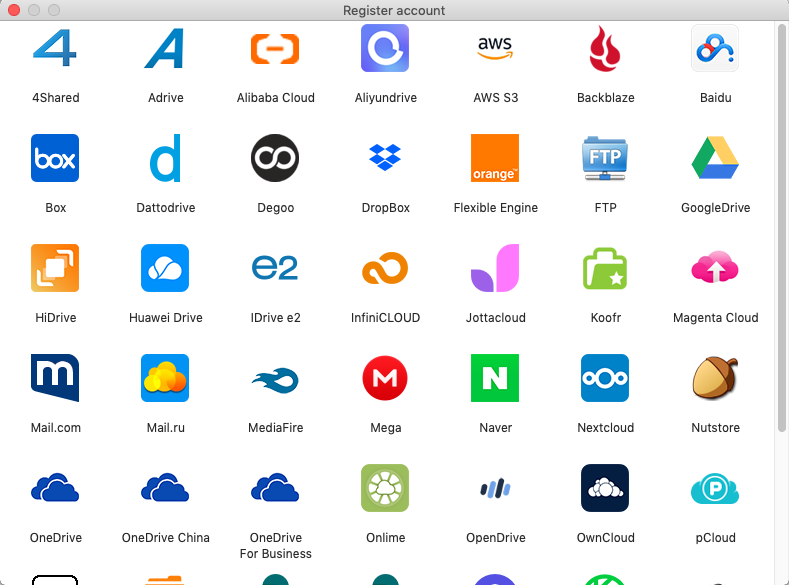
To download and install Air Explorer to upload files to the cloud on Mac, visit the official website and follow the installation instructions. After installation, you can add cloud accounts by selecting “Add Account” and choosing from options like Google Drive, Dropbox, and OneDrive. Follow the prompts to authenticate and connect each account. Air Explorer allows you to manage multiple cloud services from a single interface, making it easy to transfer, synchronize, and organize your files across different platforms.

Air Explorer supports more than 30 clouds, as well as WebDav, FTP, SFTP and the S3 protocol.
Uploading files to the cloud using Air Explorer
Using Air Explorer to upload files from your Mac to the cloud offers several advantages. It supports multiple cloud services, allowing you to manage all your accounts (like Google Drive, Dropbox, and OneDrive) from a single interface. This makes it easy to transfer files between different cloud providers and your local storage. Air Explorer also supports encryption, ensuring your files are secure during transfers between your Mac and the cloud. Additionally, it offers features like search and synchronization, which help automate backups and keep your files up-to-date across all platforms.
1. Uploading files
Once you have set up your cloud accounts in Air Explorer, you can start uploading files from your Mac.
You have two options:
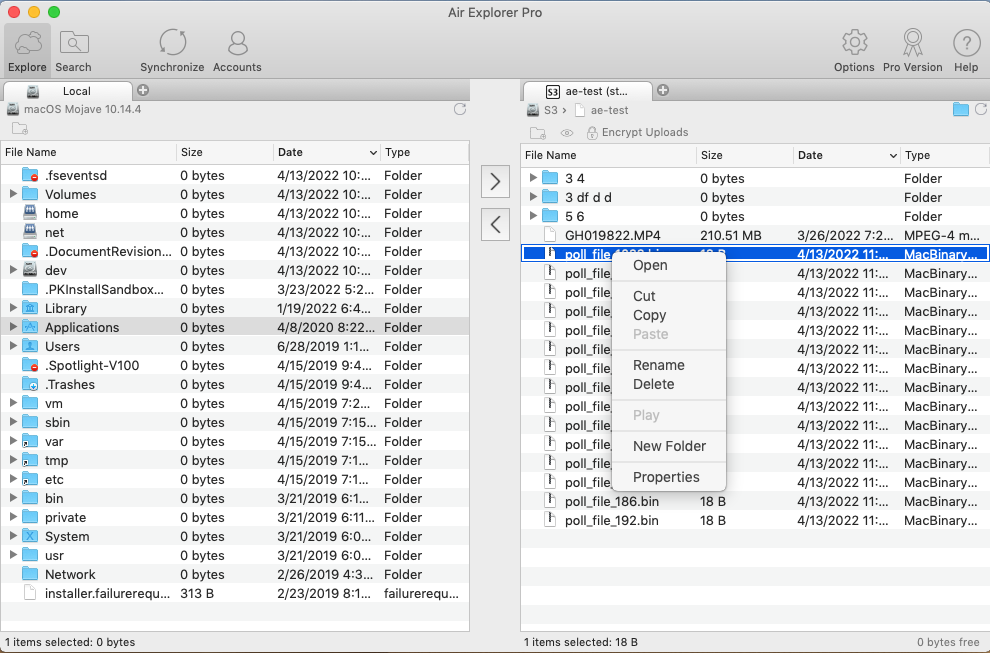
- Drag-and-drop method for uploading files: Open in one window of Air Explorer the cloud account and simply drag and drop files from your Mac into the corresponding cloud folder.
- Selecting files and using the upload button.

With Air Explorer you can create and organize folders. You can also rename and delete files and folders. Another feature of the program is that you can encrypt when uploading files from your Mac to the cloud of your choice.
2. Synchronizing files
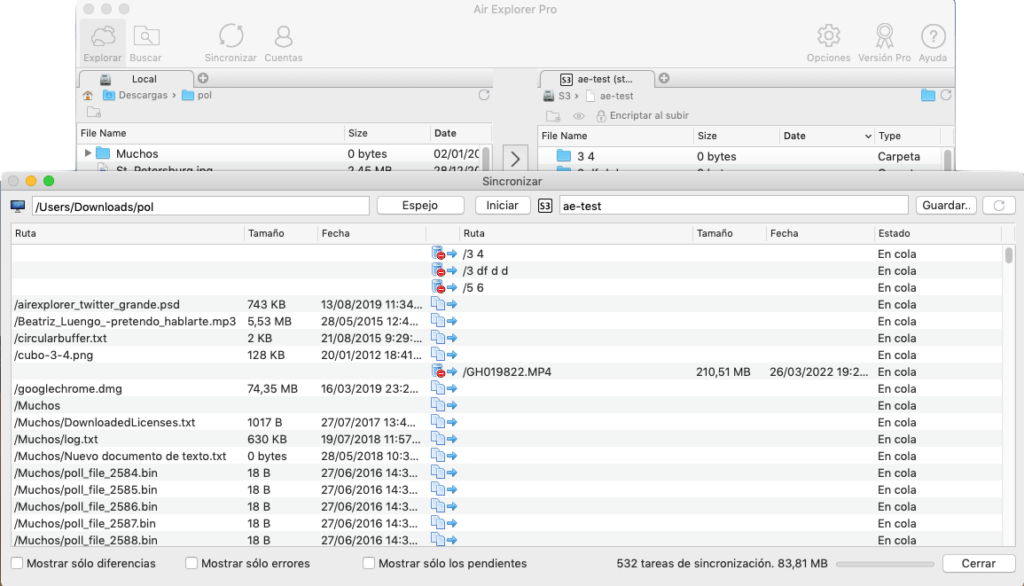
Another option offered by Air Explorer to avoid uploading files manually is to create a sync synchronization. You can create a file sync from your Mac to the cloud. And, you can also create a sync between two clouds, so you can have a backup of one of your clouds.

Conclusion
Cloud storage has revolutionized how we store and access data, offering benefits like accessibility, scalability, and security. For Mac users, cloud storage is essential for seamless data synchronization across devices. Popular services such as iCloud, Google Drive, Dropbox, and OneDrive provide robust solutions for storing files. However, managing multiple cloud accounts can be challenging. This is where third-party cloud management software comes in handy. Tools like Air Explorer, Transmit and FileZilla simplify the process, allowing Mac users to efficiently manage their cloud storage, ensuring their data is always organized and accessible.
You can check more information here:
-Manage your files on the cloud with Air Explorer for Mac
-Cloud backup with Mac
-Air Explorer for Mac, for backups and synchronizations

