
Air Explorer 6.0.0: The Interface and Everything You Can Do with It
November 20, 2026
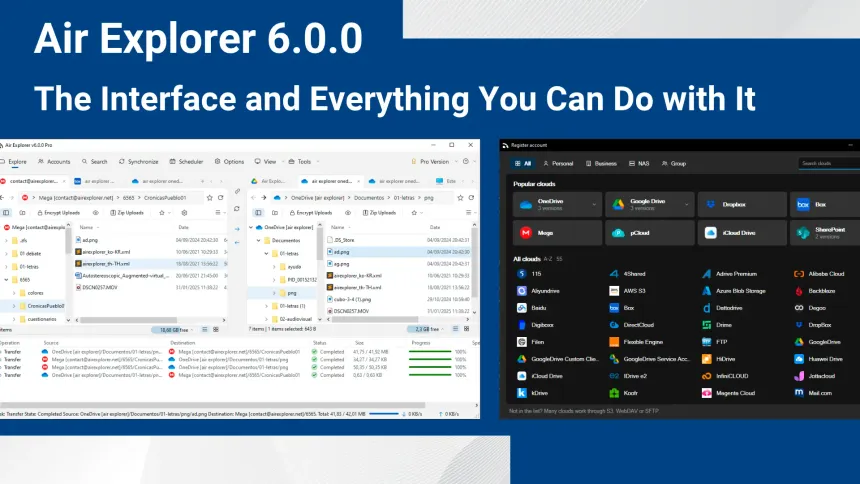
Air Explorer is designed in the style of Windows 11, with light and dark themes. All its features are organized in a top navigation bar, with a section for each task: Explore, Accounts, Search, Synchronize, Scheduler, Options, View and Tools. Below we explain what you can do in each one, whether you are opening Air Explorer for the first time or have been using it for years.
The screenshots show Air Explorer 6.0.0 for Windows. The Mac version has its own design, and most of the features explained here are available there too.
Light, Dark or Whatever Windows Uses
In Options → Appearance you can choose Light, Dark or Auto, which follows the setting of Windows and changes along with it. In the same place there is an option to use compact rows in the lists, handy on small screens or when a folder holds thousands of files. If you use the high contrast mode of Windows, Air Explorer takes the system colors.
The Explorer: Two Clouds Side by Side
Explore is the screen you will spend the most time on. It shows two panels, and each one can open a different cloud, a different account of the same cloud or a folder of your computer. Every panel has its own tabs, so you can keep several locations open and switch between them without losing your place, and a path bar that shows where you are and lets you jump back to any parent folder with one click.
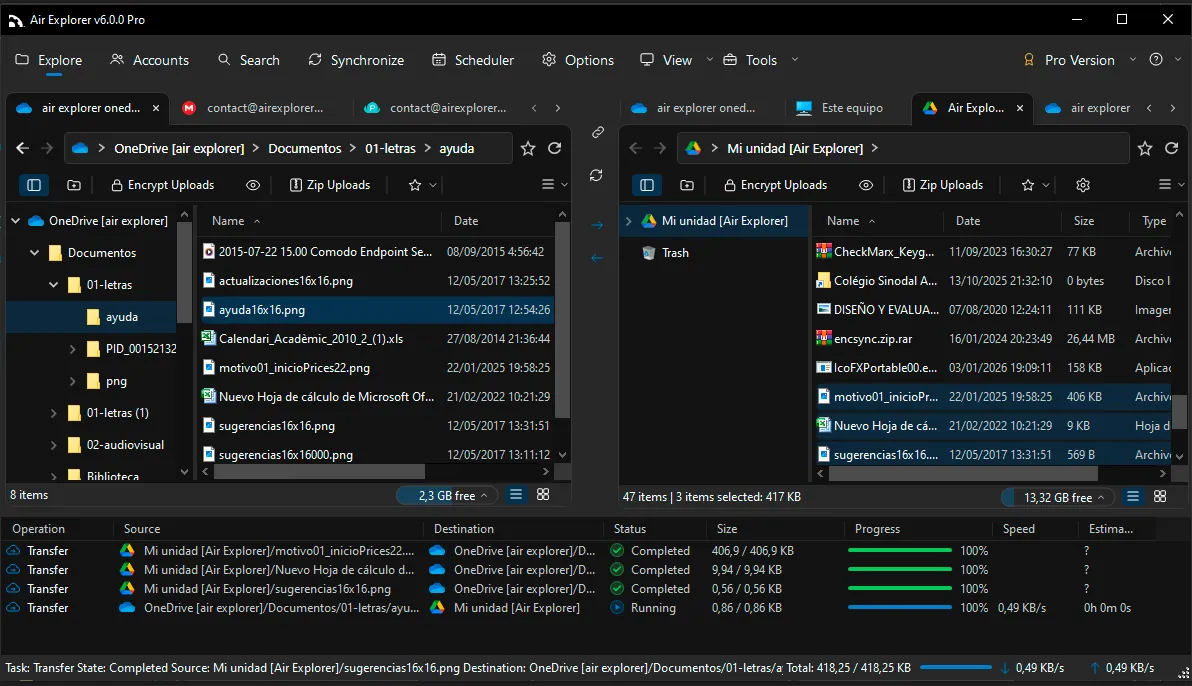
To copy files from one cloud to another, drag them from one panel to the other or use the arrows in the bar between the panels. The files travel directly from cloud to cloud, without being stored on your disk first. That same bar has two more buttons: Link browsing, which makes the second panel follow the first as you open folders, and Synchronize Current Folders, which compares the two open folders and brings them into line.
Above each list you will find the tools that change how uploads behave. Encrypt Uploads encrypts the files before they leave your computer, Zip Uploads compresses them into a zip file on the way, the eye icon shows or hides hidden files and the star saves the current folder in your bookmarks. At the bottom of each panel you can see the free space left in that account and switch between the list view and the thumbnail view.
Under the panels sits the transfer queue, with the source, destination, size, status and progress of every operation. If you have command line support enabled, you can right-click any task and choose Copy as command line to get the exact command that repeats it, ready to paste into a script.
Four Panels When Two Are Not Enough
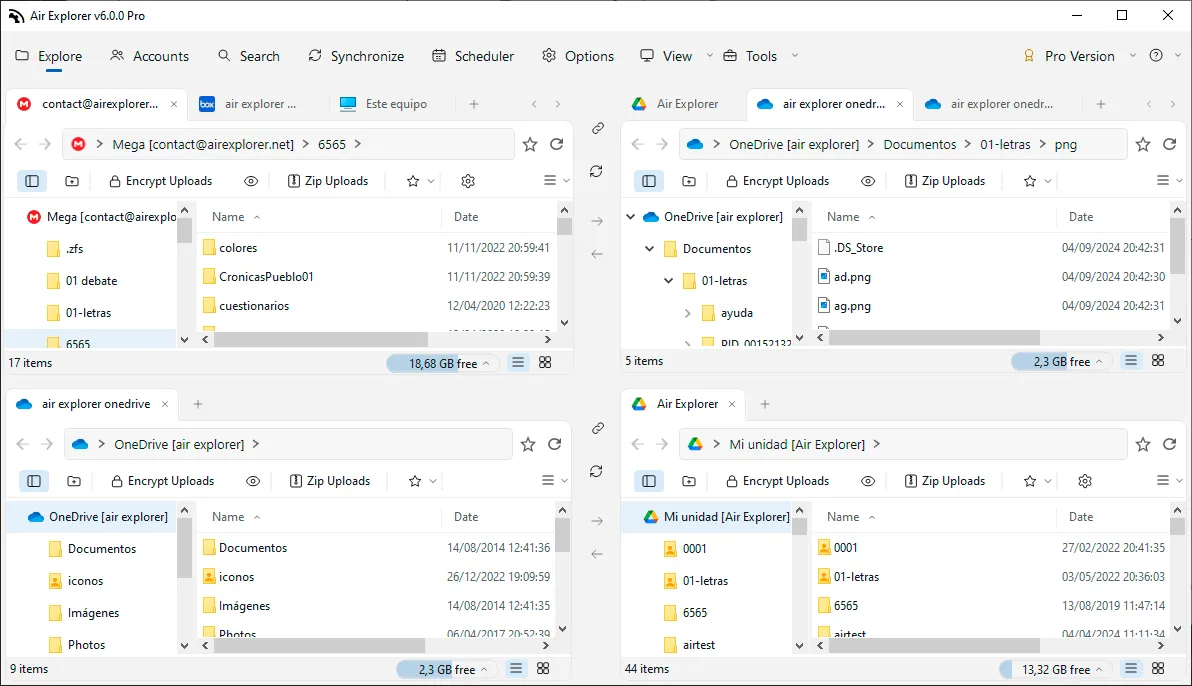
From the View menu you can switch between one, two and four panels. Four panels are useful when you reorganize several accounts at the same time, for example when you move files from two old clouds into two others. Each panel keeps its own tabs and toolbar, and you can drag between any of them. We explain it in more detail in Managing Four Cloud Accounts in One Screen.
Adding Clouds and Organizing Your Accounts
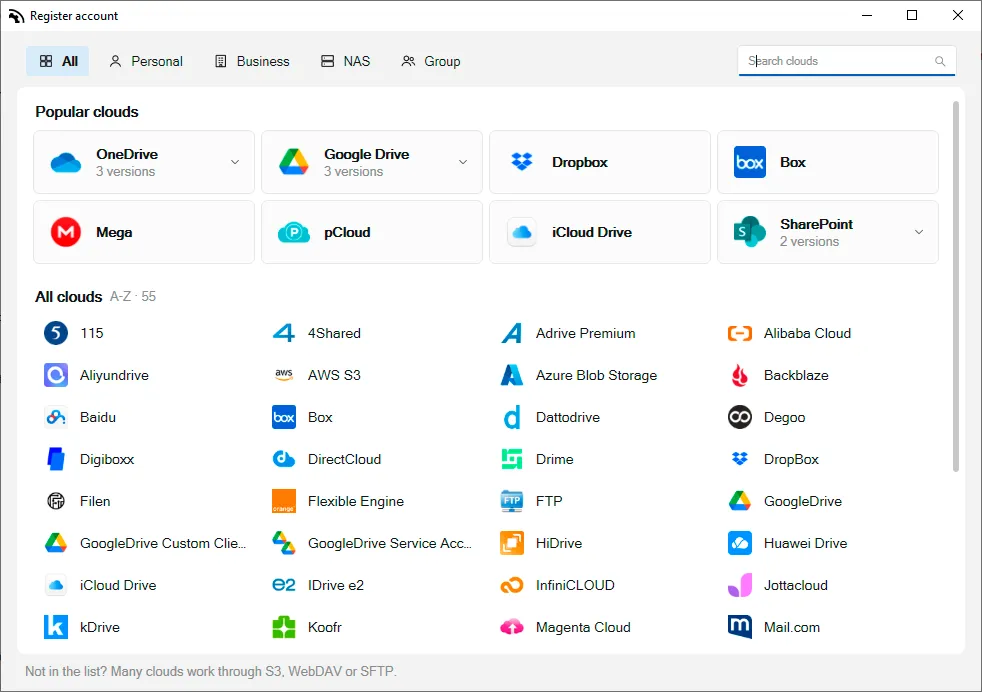
In the window for adding accounts, the most popular clouds, such as OneDrive, Google Drive, Dropbox, Box, MEGA, pCloud, iCloud Drive and SharePoint, appear at the top. Below them is the complete list, with a search box so you can type the name of your service instead of scrolling. Tabs at the top filter the list by personal clouds, business clouds and NAS. If your service is not on the list, it can probably be added through S3, WebDAV or SFTP.
The Accounts screen brings all your accounts together with their size and free space. You can sort them into your own categories, such as work, family or personal, give each one a display name and a description, and find any of them with the search box. The panel on the right holds the settings of the selected account, for example whether deleted files go to the cloud’s trash. The Import and Export buttons copy your accounts to another computer without adding them one by one.
Synchronize: All Your Syncs at a Glance
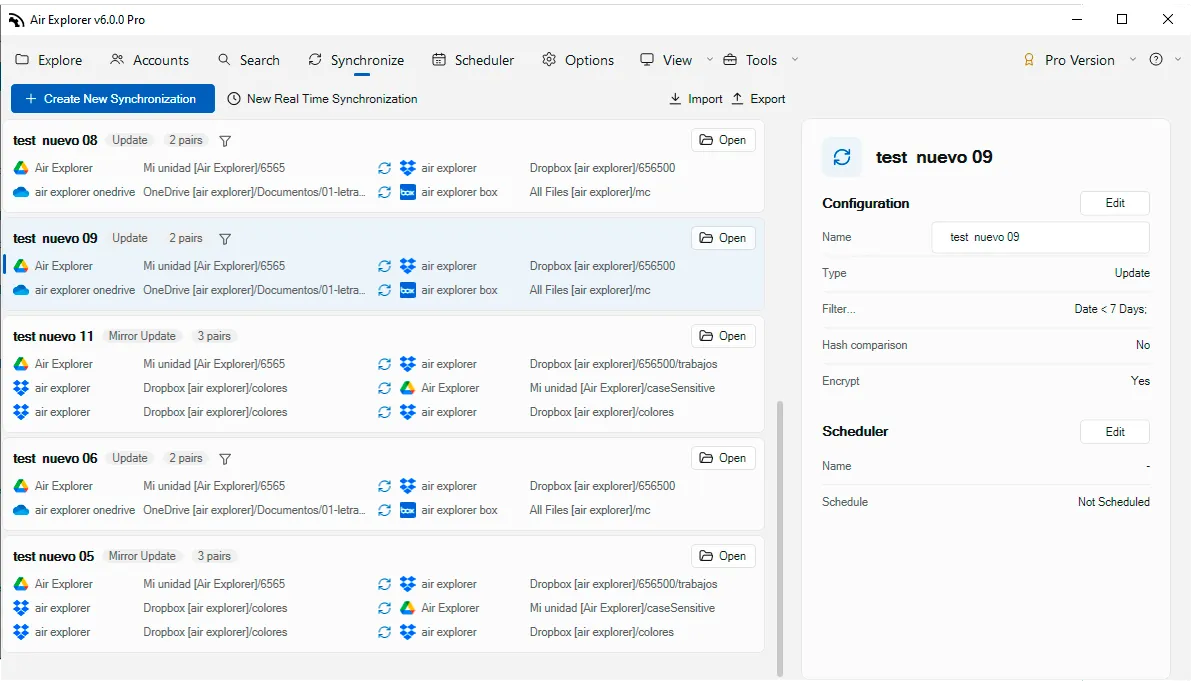
The Synchronize screen shows your saved synchronizations as cards. Each card shows its name, its type (Update, Mirror, Mirror Update or Bidirectional), how many pairs of folders it covers and which accounts take part. Click a card and the panel on the right shows its configuration, such as filters, hash comparison and encryption, and whether it has a schedule. From here you can also create a real-time synchronization, which keeps a folder up to date as soon as something changes.
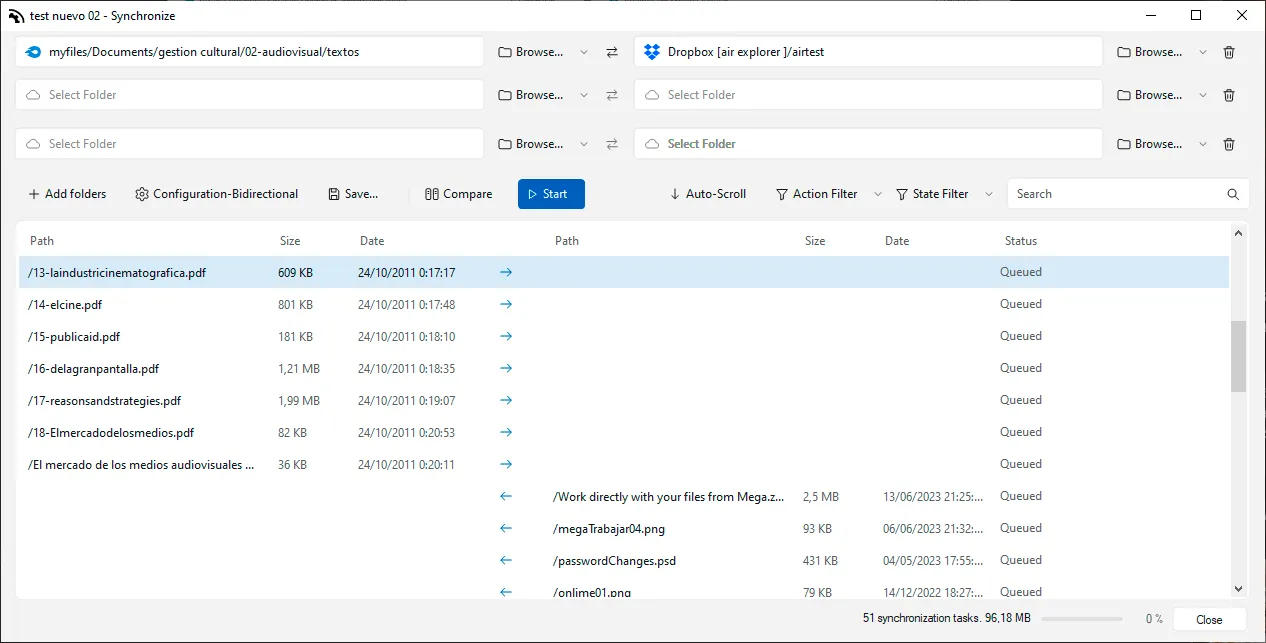
When you open a synchronization, Air Explorer compares the folders and lists every file it is going to copy, with arrows that show the direction of each one. Before clicking Start you can filter the list by action or by status, and you can export it to CSV if you want to review it calmly or keep a record. Our sync guide explains each type in detail.
Search in One Cloud or in All of Them
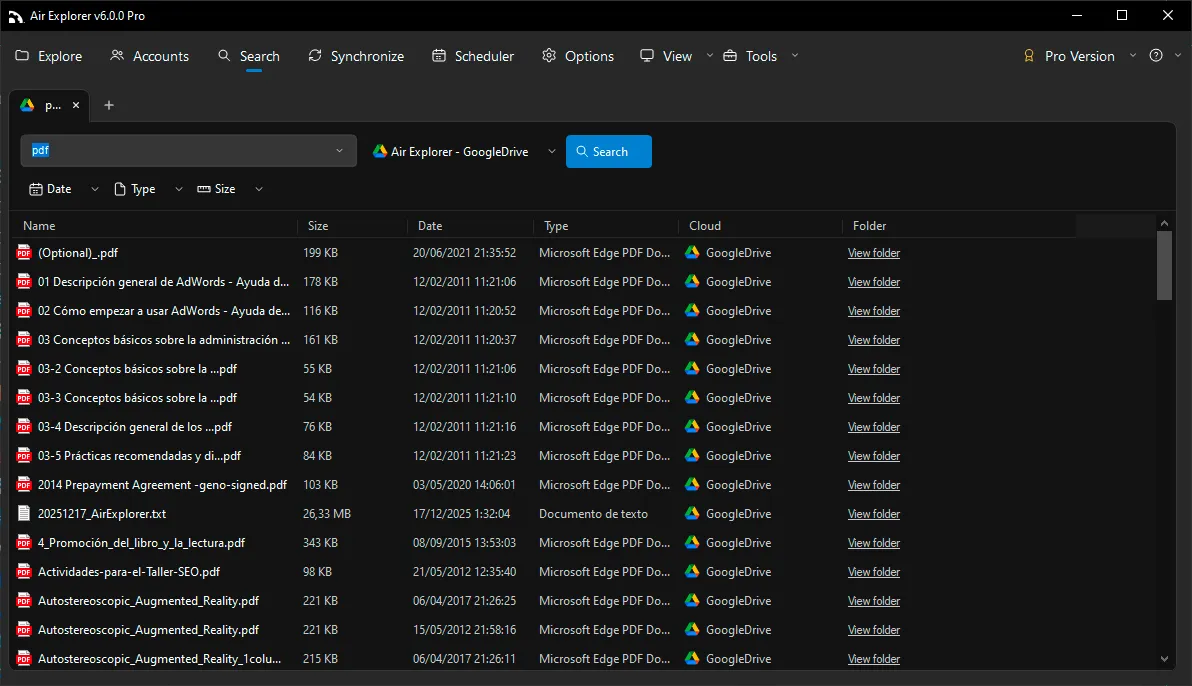
Search opens in its own tabs. Type a name, choose one account or all of them, and narrow the results by date, file type and size, from tiny files to files larger than 4 GB. The results show the size, date, type and cloud of each file, and the View folder link opens the folder where it is stored. It is the quickest way to find a document when you do not remember which account you saved it in. You can read more in the cloud search guide.
The Scheduler: Backups That Run on Their Own
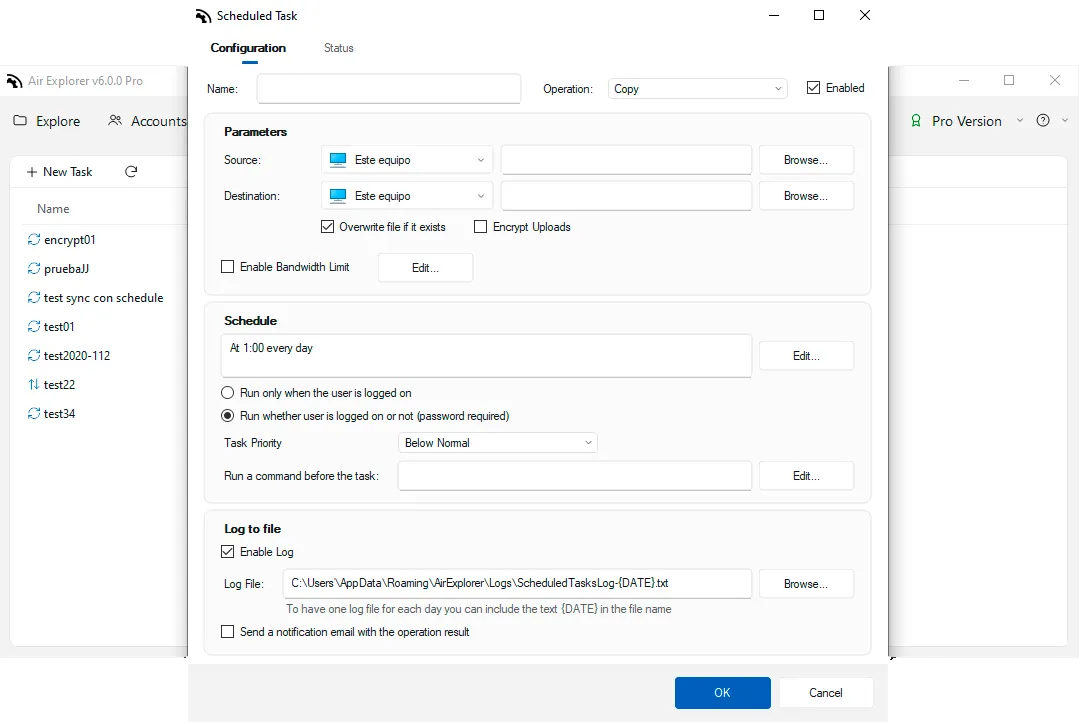
The Scheduler runs copies, transfers and synchronizations at the time you choose, every day, every week or once. Each task can limit its bandwidth, encrypt what it uploads, run a command before it starts, write a log and send you an email with the result. The list shows the last result of each task, opens its latest report and can be sorted by any column, so you can see at a glance whether last night’s backup finished well. The task scheduler page has all the details.
Encryption and Shared Links
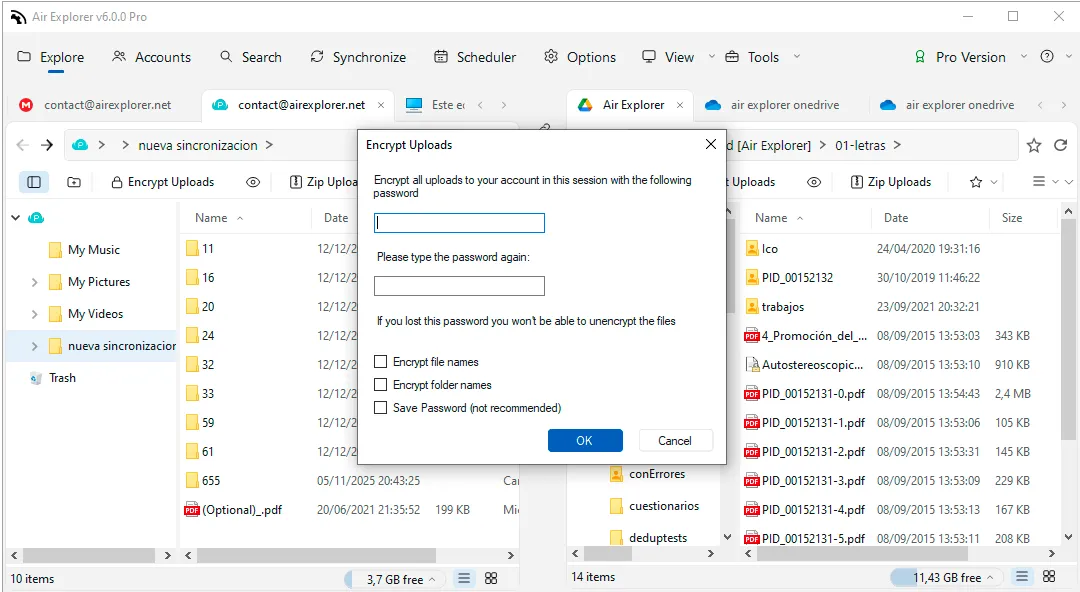
When you turn on Encrypt Uploads, Air Explorer asks for a password and encrypts your files on your own computer before uploading them. You can also encrypt file and folder names, so nobody can tell what you keep in the cloud just by looking at the list. Renaming files and creating folders follows those same settings too. More about this on the file encryption page.
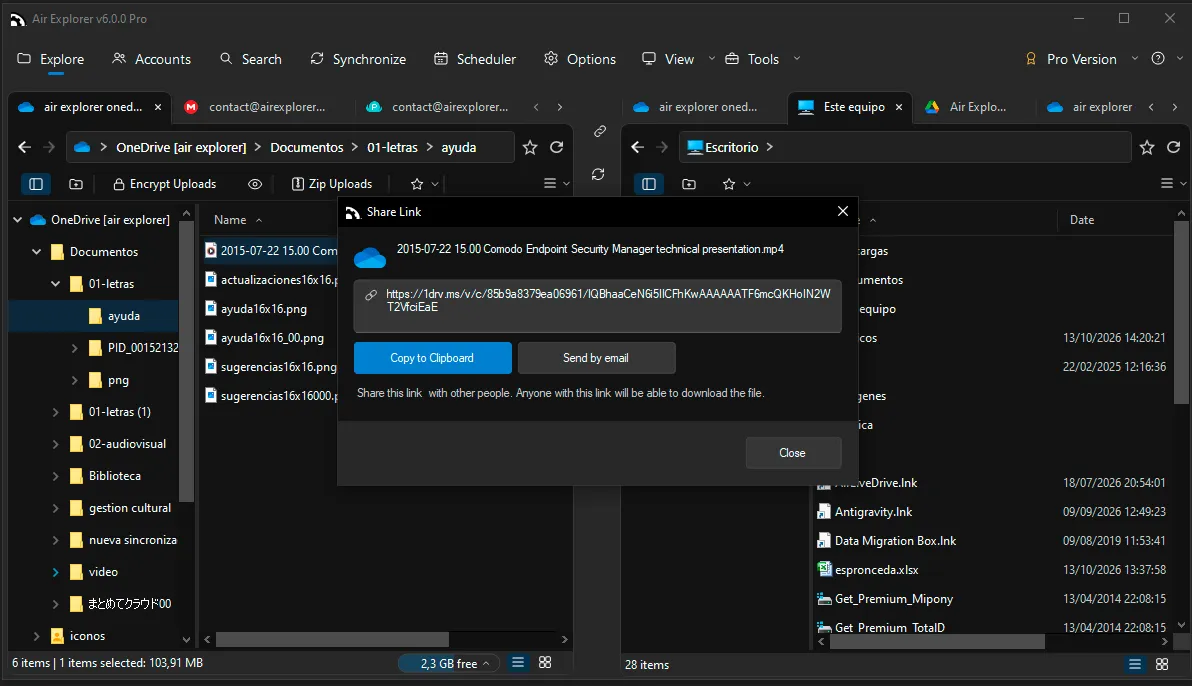
To share a file, right-click it and choose Share Link. Air Explorer creates the link in that cloud and lets you copy it or send it by email without opening the service’s website. See how it works with each cloud in the share links guide.
Google Drive Duplicates and AI Assistants
Two more features save you a lot of manual work. The first is the duplicates tool for Google Drive, which you open from the account settings. Choose a folder, click Analyze and decide what to do with each group of duplicates: keep one copy or merge the folders. Nothing is deleted permanently, because everything goes to the Google Drive trash and every change is written to the log.
The second is AI Skills, in the Tools menu, which connects Air Explorer to Claude Code, ChatGPT or Antigravity so you can manage your clouds by asking in plain language: “copy the Archive folder from my Dropbox to my Google Drive” or “how much free space is left on each account?”. You will find the setup in the AI Skills guide and plenty of ideas in our 30 AI prompts.
Free and Pro
Air Explorer is free for Windows and Mac, does not ask you to register and lets you explore your clouds and move files between them with one account per cloud. Air Explorer Pro adds unlimited accounts, multiple synchronizations, the scheduler, the command line and control with AI assistants. The best way to get to know Air Explorer is to try it: download Air Explorer, add your first cloud and start exploring.
manualwindowsinterfacesynchronizationsearch
Back to blog